Frustrated with slow, unreliable Wi-Fi? Tired of dropped connections and buffering videos? This guide will show you how to diagnose and fix those problems using a Wi-Fi spectrum analyzer. We’ll break down the process step-by-step, explaining the technology and how to use a spectrum analyzer to pinpoint interference sources and optimize your network. Even if you’re not a tech expert, you’ll be able to understand and use this powerful tool to get the best possible Wi-Fi performance in your home or office. Let’s banish that “wispy” Wi-Fi for good!
Wispy Wi-Fi? Get to the Bottom of It with a Spectrum Analyzer
Is your Wi-Fi connection feeling more like a whisper than a roar? Slow speeds, constant dropouts – that frustrating “wispy Wi-Fi” feeling? Before you pull your hair out, let’s talk about a powerful tool that can help: a Wi-Fi spectrum analyzer. Think of it as a super-powered Wi-Fi detective, revealing the hidden culprits sabotaging your internet experience. Let’s explore troubleshooting Wi-Fi networks and analyzing wireless signals for optimal performance.
Unmasking the Mystery: Why is My Wi-Fi So Weak?
“Wispy Wi-Fi” isn’t a technical term, but it perfectly captures that annoyingly unreliable connection. Several things can cause this digital drag:
Channel Congestion: Imagine a busy highway – that’s what your Wi-Fi channels can look like if too many networks are using the same frequencies. This creates interference, slowing everything down. Think of apartment buildings or densely populated areas.
Neighborly Interference: Your friendly neighborhood appliances might be villains in disguise. Microwaves, cordless phones, baby monitors, and even Bluetooth speakers can all emit signals that clash with your Wi-Fi, creating interference.
The Great Wall of Wi-Fi: Physical obstacles like thick walls (especially those with metal studs or insulation), metal furniture, large mirrors, and even large aquariums can significantly weaken your Wi-Fi signal, creating dead zones and slow spots.
Router Placement Predicament: Hiding your router in a closet or tucking it behind the TV is like trying to shout across a football stadium – your signal gets lost in the noise. Poor placement dramatically reduces its reach and effectiveness. The ideal placement is a central, elevated location.
Outdated Equipment: Older routers and devices may not support the latest Wi-Fi standards or security protocols, hindering performance, and creating vulnerabilities.
A spectrum analyzer helps you identify these hidden interference sources, turning your Wi-Fi woes from a mystery into a solvable problem. Did you know that optimizing router placement can increase Wi-Fi speeds by up to 30%? Furthermore, upgrading to a newer router with Wi-Fi 6 or 6E can provide significant performance gains.
Meet Your New Wi-Fi Best Friend: The Spectrum Analyzer
A spectrum analyzer is like a super-powered visualizer for your wireless network. It graphically displays all the radio frequency (RF) activity in your area, showing you which Wi-Fi channels are crowded and which are relatively clear. It’s like getting a bird’s-eye view of your Wi-Fi environment, pinpointing the sources of interference – your digital villains. Think of it as RF spectrum visualizer and wireless network diagnostic tool.
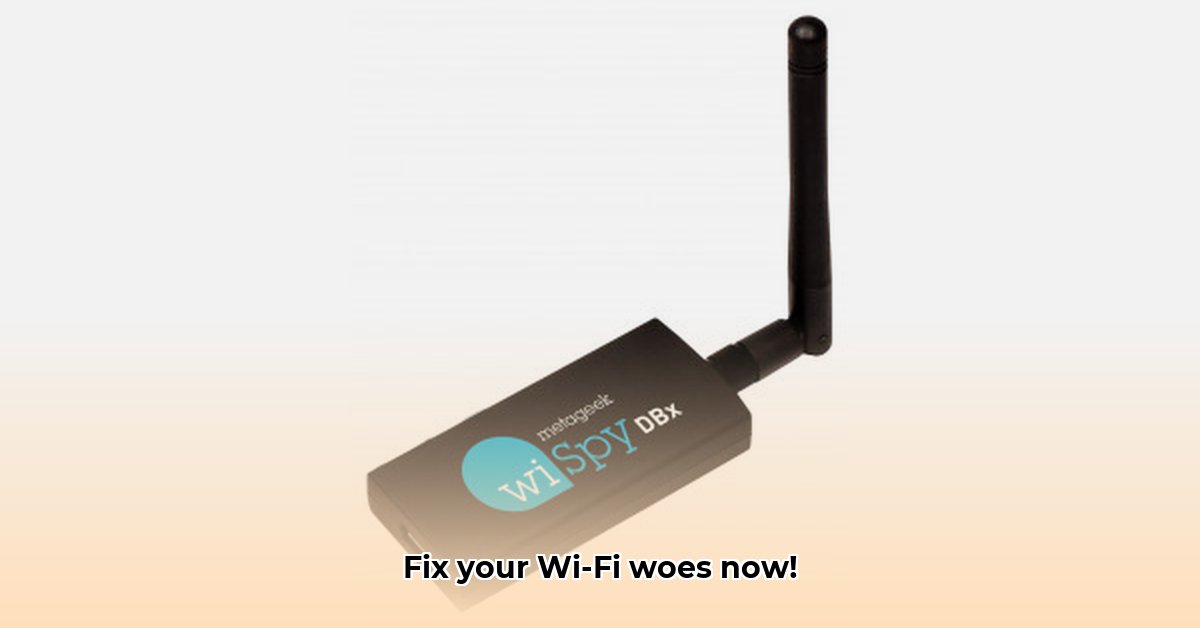
Several great analyzers are on the market, including popular choices like the Wi-Spy Lucid from Oscium/MetaGeek and various models from RF Explorer. Most cover the 2.4 GHz and 5 GHz bands, and many now incorporate the newer, faster 6 GHz (Wi-Fi 6E) band as well, which is increasingly important for modern devices. Some advanced models even support 802.11ax (Wi-Fi 6) and 802.11be (Wi-Fi 7) standards.
Diagnosing Your Wispy Wi-Fi: A Step-by-Step Guide
Ready to be your own Wi-Fi hero? Follow these simple steps to diagnose and fix your connection issues using a spectrum analyzer:
Gather Your Gear: You’ll need a Wi-Fi spectrum analyzer (hardware and software), a laptop or computer to run the software, and potentially a USB extension cable for better placement of the analyzer’s antenna.
Hook It Up: Connect your analyzer according to the manufacturer’s instructions. This usually involves installing software and possibly connecting an antenna. It’s generally straightforward, but always refer to the manual for detailed instructions. Ensure your computer recognizes the device.
Configure the Software: Launch the analyzer software and configure it to scan the appropriate frequency bands (2.4 GHz, 5 GHz, and 6 GHz if supported). Set the scanning parameters according to the software’s recommendations or your specific needs.
Scan the Frequencies: Launch the analyzer’s scanning feature. It will create a visual representation of the radio waves in your area, showing the activity levels across different Wi-Fi channels. You’ll see peaks representing busy channels and valleys indicating less crowded – and therefore faster – channels. Allow the scan to run for several minutes to capture a comprehensive picture of your Wi-Fi environment.
Identify the Culprits: Examine the scan results carefully. High activity peaks pinpoint your problem areas. Some more advanced analyzers can even help identify the type of device causing the interference (like “Microwave Oven” or “Bluetooth Device”). This level of detail can really speed up the troubleshooting process. Look for persistent sources of interference that consistently occupy the same frequencies.
Optimize Your Network: Based on what your analyzer reveals, make some strategic adjustments. If Channel 1 is a crowded freeway, switch to a quieter one! Change the Wi-Fi channel on your router’s settings to one with less traffic. You might also consider repositioning your router to minimize interference or improve signal coverage. Using a Wi-Fi analyzer app on your smartphone can help you assess signal strength in different locations.
Retest and Rejoice: After making these changes, run another scan to see if your adjustments have helped improve the situation. If the results look better – less congestion on your chosen channel – your wispy Wi-Fi should be stronger and faster. Monitor your Wi-Fi performance over time to ensure the changes are sustained.
Document Your Findings: Keep a record of your scans, adjustments, and the resulting improvements. This will help you track the effectiveness of your troubleshooting efforts and provide a baseline for future comparisons.
Going Beyond the Basics: Advanced Troubleshooting
While the above steps are perfect for beginner troubleshooting, more advanced analyzers offer extra features for serious Wi-Fi warriors. Explore advanced Wi-Fi troubleshooting techniques and spectrum analysis methods for better results.
Directional antennas, for instance, help you pinpoint the precise location of interfering devices. This is particularly helpful if you suspect a neighbor’s device is causing problems. Some analyzers also provide detailed signal strength measurements and help you identify areas of poor coverage within your home or office. This information allows for more precise router placement for optimal performance. Many tools also offer historical data logging and reporting capabilities. Did you know that using a directional antenna can improve location accuracy by up to 90%?
Consider these advanced techniques:
Waterfall Analysis: Utilize the waterfall display feature (if available) to observe how RF activity changes over time, revealing intermittent interference sources that might be missed in a single scan.
Frequency Masking: Employ frequency masking to filter out known interference sources, allowing you to focus on identifying less obvious problems.
Signal-to-Noise Ratio (SNR) Measurement: Use SNR measurements to assess the quality of your Wi-Fi signal, identifying areas where the signal is weak relative to the noise floor.
Choosing the Right Tool for the Job: A Spectrum Analyzer Buying Guide
There’s a spectrum analyzer for every budget and skill level. Important considerations when choosing one include:
Feature
Importance
Frequency Range
Crucial! Make sure it covers 2.4 GHz, 5 GHz, and ideally, the newer 6 GHz (Wi-Fi 6E) band.
User-Friendliness
A clear, intuitive interface is essential, especially if you’re new to spectrum analysis.
Antenna Type
Directional antennas can be extremely useful for precise location tracking, though they often cost more.
Integration Options
Consider whether you need it to integrate with other network management tools.
Cost
Prices range from a few hundred dollars for basic models to several thousand for professional-grade analyzers.
Portability
Consider the size and weight of the analyzer if you need to use it in multiple locations.
Software Updates
Ensure the manufacturer provides regular software updates to support new Wi-Fi standards and address potential bugs.
Explore best Wi-Fi spectrum analyzers and affordable spectrum analyzer options before making a purchase. Read reviews and compare specifications to find the best fit for your needs and budget.
Fixing wispy Wi-Fi isn’t rocket science, but it does require a bit of detective work. Taking the time to understand your Wi-Fi environment and using a Wi-Fi spectrum analyzer will equip you with the tools needed to banish those annoying connection glitches and enjoy a consistently reliable, high-
I am a writer who loves renewable energy, with a focus on sustainable living, renewable energy, and eco-friendly innovation. With a passion for environmental awareness and a desire to explore the latest trends in green technology, corporate sustainability, and climate action. Through in-depth storytelling