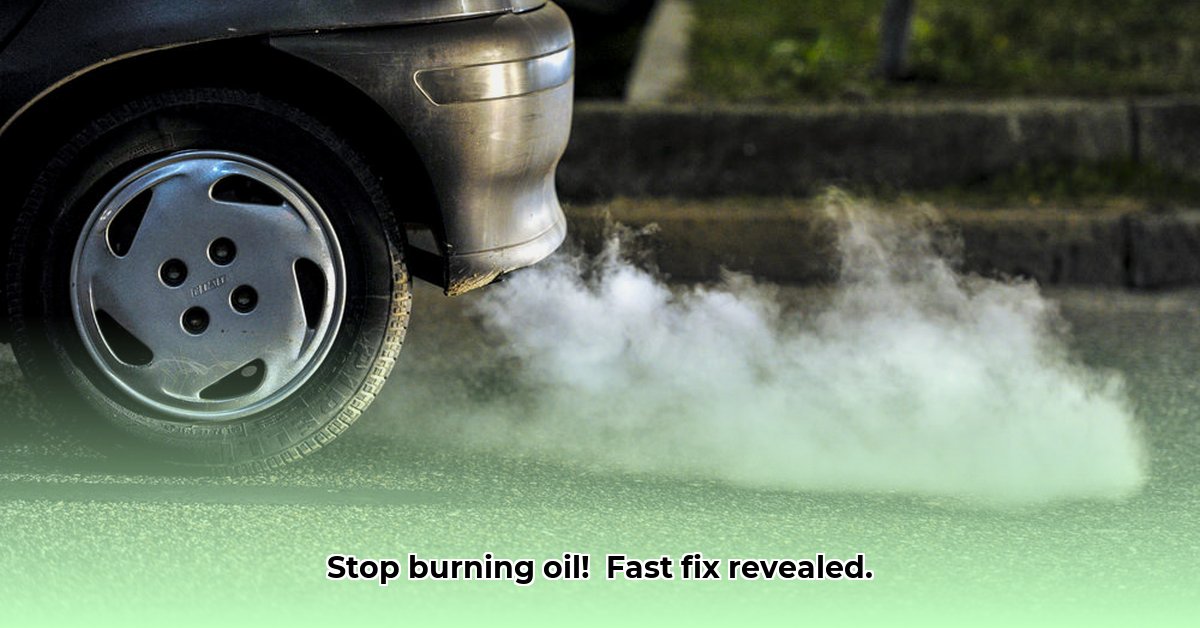
Is your car burning oil faster than you can add it? Seeing blue smoke in your rearview mirror? This guide provides a step-by-step approach to diagnosing and fixing your car’s oil-burning issue. We’ll cover everything from identifying the problem, determining the cause, and implementing effective solutions. For more on automotive system issues, check out this guide on battery charging systems. Whether you’re a DIY enthusiast or prefer professional help, we’ve got you covered. Let’s get your engine running smoothly again!
Spotting the Signs: Identifying Engine Oil Burning
Is your car emitting blue smoke? Is engine oil disappearing rapidly? Many car owners face this issue, and it’s often fixable. Let’s explore the causes of your car burning oil and restore it to optimal condition. Engine oil is crucial for lubrication; burning oil diminishes engine efficiency and can lead to serious damage if neglected. Recognizing the symptoms early can save you time and money.
Blueish Exhaust Smoke: Hazy, bluish-grey plumes from the tailpipe are a key indicator, especially noticeable during startup or acceleration.
Low Oil Levels: Consistently dropping oil levels, despite regular top-ups, are a red flag. Check your oil level more frequently than usual.
Engine Performance Dip: Loss of power, rough idling, or unusual noises can be linked to oil burning. The engine might struggle to accelerate or maintain speed.
Burning Smell: An acrid odor emanating from the engine bay might suggest oil combustion, particularly after the engine has warmed up.
Oil Deposits: Check your spark plugs for oil fouling. Remove a spark plug and inspect it; if it’s coated in oil, it’s a strong indication of internal oil burning.
Unmasking the Culprit: Common Causes of Oil Burning
Several factors can cause your engine to consume oil excessively. Here are the common suspects:
Worn-Out Piston Rings: These act as seals preventing oil from entering the combustion chamber. Worn rings allow oil to seep in, mix with fuel, and burn—a major issue often needing extensive engine repair. This often presents with blue smoke during acceleration.
Leaky Valve Seals: These seals keep oil lubricating the valve guides. Damaged seals allow oil to enter the combustion chamber, resulting in blue smoke, especially upon startup or during periods of idling. Replacement is typically a less extensive repair than piston rings.
Faulty PCV Valve: The PCV (Positive Crankcase Ventilation) valve regulates pressure within the engine. A faulty valve can cause pressure buildup, forcing oil into unintended areas, leading to burning. Repairing this is often inexpensive and should be one of the first things you check.
External Oil Leaks: Simple leaks from cracked oil pans, faulty gaskets (like the valve cover gasket or head gasket), or damaged oil filters could be the cause. Inspect thoroughly for any visible oil leaks around the engine.
Turbocharger Issues (If Applicable): If your vehicle has a turbocharger, a failing turbo seal can allow oil to leak into the intake or exhaust, resulting in burning.
Incorrect Oil Viscosity: Using an oil viscosity that is too thin for your engine (especially in older vehicles) can lead to increased oil consumption.
Engine Overfill: Overfilling the engine with oil can create excessive pressure, forcing oil past seals and into the combustion chamber.
Also, some newer engines use more oil; consult a mechanic specializing in your car type to determine if it is within normal parameters.
Step-by-Step Investigation: A Practical Approach
Before considering major engine repairs, let’s investigate systematically:
Step 1: Check the Oil Level: Use your dipstick to check the oil level. Low oil combined with blue exhaust smoke strongly suggests oil burning. Ensure the car is on level ground and the engine is cool for the most accurate reading.
Step 2: Inspect for Leaks: Examine the engine for oil leaks around the oil pan, valve cover gasket, oil filter, and other potential leak points. Place cardboard under the engine overnight to help identify the source of any drips.
Step 3: Analyze the Smoke: Observe the exhaust smoke color. Blue smoke suggests burning oil, white smoke indicates a coolant leak (often with a sweet smell), and black smoke indicates a fuel-related issue. Note when the smoke is most prevalent (startup, acceleration, idling).
Step 4: Check the Spark Plugs: Remove the spark plugs and inspect their condition. Oily or fouled spark plugs indicate oil is entering the combustion chamber.
Step 5: Perform a Compression Test: A compression test measures the pressure within each cylinder. Low compression can indicate worn piston rings or valve issues. This test requires specialized tools and is best performed by a mechanic.
Step 6: Check the PCV Valve: Remove the PCV valve and inspect it for clogs or damage. A functioning PCV valve should rattle when shaken. You can often clean the PCV valve with carburetor cleaner.
Step 7: Consult a Professional: If unsure, consult a trusted mechanic for diagnostics, such as compression tests (checking piston sealing) and leak-down tests (checking cylinder leaks). A mechanic can also use a borescope to inspect the cylinders for oil buildup.
Repair Costs and Considerations
Repair costs depend on the cause ranging from minor PCV valve replacement to significant engine rebuilds for piston ring issues. Get estimates from multiple mechanics before committing to any repairs.
Component
Typical Repair Cost (USD)
PCV Valve
$50 – $200
Valve Seals
$300 – $1500
Oil Pan Gasket
$150 – $500
Valve Cover Gasket
$100 – $400
Piston Rings
$2000 – $6000+
Turbocharger (If Applicable)
$500 – $3000+
Engine Rebuild/Replacement
$3000 – $8000+
Note: These are estimates and can vary based on location, labor costs, and the specific vehicle. Prices can fluctuate due to parts availability and complexity of the job.
These estimates provide a general guide, but costs can vary significantly based on location and vehicle requirements. Consider the age and overall condition of your vehicle when deciding whether to invest in major repairs.
Proactive Maintenance for Prevention
Preventing oil burning starts with regular maintenance and using the right type of oil.
Stick to the Schedule: Follow the manufacturer’s recommended maintenance schedule for oil changes and other services.
Use the Right Oil: Use the correct motor oil type and weight as recommended in your owner’s manual. Consider using a high-mileage oil for older vehicles, as these oils contain additives that can help reduce leaks and oil consumption.
Practice Gentle Driving: Avoid aggressive driving (hard acceleration and high RPMs), which stresses the engine.
Monitor Oil Regularly: Check oil levels frequently (at least weekly) to detect early warning signs of oil burning or leaks.
Address Leaks Promptly: Repair any oil leaks as soon as they are discovered to prevent further damage.
Consider Oil Additives: Some oil additives claim to reduce oil consumption and seal leaks, but use them with caution and research their effectiveness.
Addressing oil-burning promptly protects your engine and saves money. Early detection can preclude larger repairs.
Diagnosing High Engine Oil Consumption in Older Vehicles
Key Takeaways:
Excessive oil consumption is abnormal and needs prompt attention.
Causes range from simple fixes to major repairs.
Early diagnosis prevents further damage and saves money.
Understanding Oil Consumption: Why Does It Happen?
Is your older car using excessive amounts of oil? Seeing blue smoke? Burning oil in older vehicles is common, but identifying the cause is crucial. It can result from minor issues or major engine problems. Internal component wear over time, coupled with the breakdown of seals and gaskets, are common culprits.
Step-by-Step Diagnosis: Finding the Root Cause
Follow these steps to diagnose the problem effectively:
Check Oil Level Regularly: Frequent low oil levels indicate a problem. Monitor your oil level every few days to establish how quickly your vehicle is losing oil.
Inspect for External Leaks: Look for wet spots or oil residue around the engine, particularly around gaskets, seals, and the oil pan.
Observe Exhaust Smoke: Blue smoke strongly suggests burning oil. Note when you see the smoke (startup, acceleration, idling).
Check for Burnt Oil Smell: An acrid smell indicates oil combustion, often noticeable after driving.
Inspect Spark Plugs: Check the spark plugs for oil fouling, which indicates oil is entering the combustion chamber.
Perform Compression Test (Professional): Measures cylinder sealing. Low compression readings can point to worn piston rings or valve issues.
Perform Leak-Down Test (Professional): This test identifies the source of cylinder leakage (valves, rings, head gasket).
Inspect PCV Valve (DIY): A clogged PCV valve can increase pressure, leading to oil leaks and burning.
Common Culprits: Identifying the Source
Several components commonly cause high oil consumption:
Worn Piston Rings: Allow oil to seep into the combustion chamber, where it
I am a writer who loves renewable energy, with a focus on sustainable living, renewable energy, and eco-friendly innovation. With a passion for environmental awareness and a desire to explore the latest trends in green technology, corporate sustainability, and climate action. Through in-depth storytelling