Want to save money on electricity and help the planet? Building your own home solar power system might be easier than you think! This guide shows you exactly how to do it, step-by-step. We’ll cover everything from planning and getting the necessary permits to installing the system and keeping it running smoothly for years. Even if you’ve never touched a solar panel before, we’ll provide the information and confidence to succeed. Learn more about solar panel energy output here. Let’s begin your solar journey!
Embracing Solar Power: Cost Savings and Environmental Benefits
Going solar at home is doable and can save you money while helping the planet. But it’s not a walk in the park. This guide will walk you through the process and what to expect along the way.
Assessing Your Home Solar Needs and Available Resources
Before you buy solar panels, figure out how much energy you actually use. Think about all your appliances – fridge, lights, TV, computers, etc. – and how long you use them each day. A home energy audit (or some handy online tools) can give you a good idea. You don’t want to buy too few panels (and end up with power shortages); but you also don’t want to overspend on more panels than you need.
Next, check out your roof. How much space do you have available that gets plenty of sunlight? South-facing roofs (in the Northern Hemisphere) are best. A lot of shade from trees will cut down on your solar panel’s effectiveness.
Finally, assess your DIY skills. Working with electricity isn’t a joke – safety’s paramount. Small projects might be fine for a handy homeowner, but for larger installations, you might call in a professional. It is best to consider getting professional help during key points of the project.
Selecting Your Ideal Solar System Type
There are different types of solar systems out there, each with its own pros and cons:
Grid-tied systems: These connect to your existing power grid. If your panels generate more power than you use, the excess goes back to the grid, potentially lowering your electricity bill. They’re generally easier to install, but you need to be connected to the grid to use them. Most places the electric company will credit your bill.
Off-grid systems: These are completely independent from the grid. Perfect for remote areas, but you’ll need batteries to store the energy your panels produce. This adds complexity and cost. You may attach a battery backup to avoid outages.
Hybrid systems: These offer both grid connectivity and battery storage combining the best of both worlds. They’re flexible and offer a backup power source during outages but tend to be more expensive than grid-tied systems. If your batteries become fully charged, surplus electricity is sent to the grid and you get paid for it in most cases. To meet your household needs, the battery pack is activated and extinguished before the utility takes over in peak demand times.
The best choice depends entirely on your specific needs, budget, and how comfortable you are dealing with electrical work.
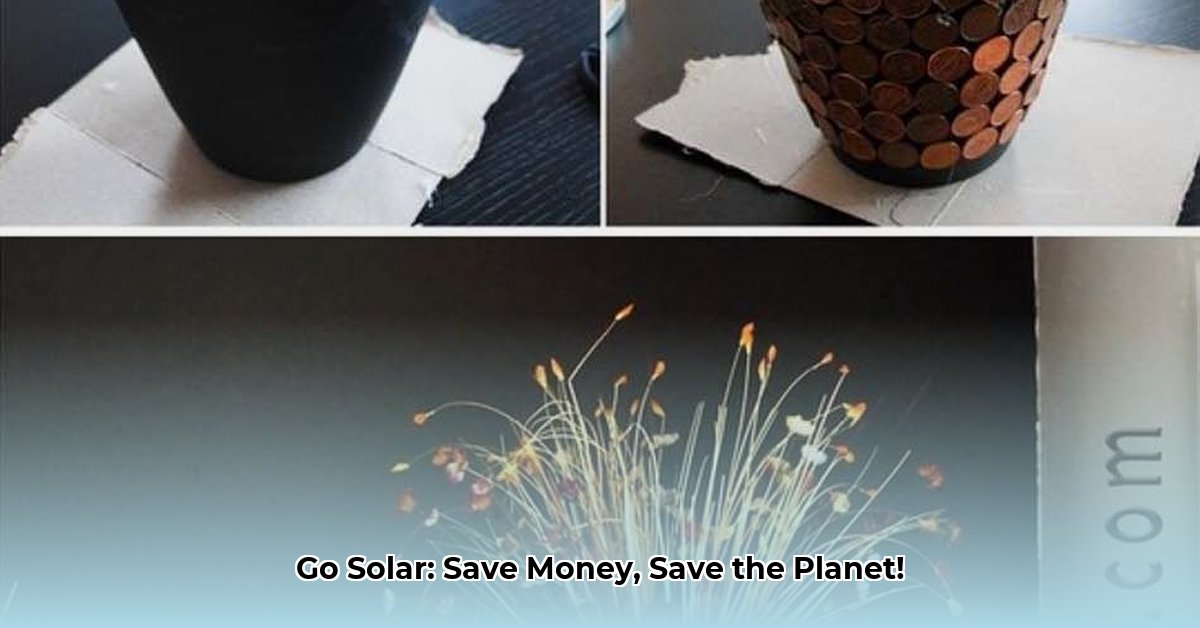
Powering a Simple Garden Light: A Beginner’s DIY Solar Project
Let’s start small. Here’s how to power up a garden light using solar energy:
Step 1: Gather Your Supplies: You’ll need a solar panel, a charge controller (to regulate the power flow), a battery (to store energy overnight), and the garden light itself. Make sure all the components are compatible and sized to match your light’s power needs.
Step 2: Plan Your Setup: Choose a sunny spot for your panel, somewhere that gets direct sunlight throughout the day. Figure out the best way to run the wiring from the panel to the light, keeping the wires short and well-protected. For rooftop solar, you could accidentally damage your roof when drilling holes or improperly waterproofing them.
Step 3: Mount the Solar Panel: Securely attach the solar panel to its mount. Ideally, it should face south (in the Northern Hemisphere) to get the most sun.
Step 4: Connect Everything: Carefully wire the components together, following the manufacturer’s instructions exactly. Solar panels generally have positive (+) and negative (-) terminals which must be carefully connected to the charge controller according to the diagrams provided. The controller is then wired to the battery and, finally, the battery is connected to the light. Double- and triple-check your wiring before you turn anything on!
Step 5: Test Your Work: Flip the switch! Did it work? Keep an eye on the system for a few days to make sure everything’s running smoothly.
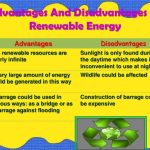
Unveiling the Pros and Cons of DIY Solar Installations
Let’s get real about the advantages and disadvantages of taking on this project yourself.
Feature
Pros
Cons
Cost
You could save a significant amount of money, It may be more cost effective for smaller electrifying projects like outdoor lighting or a tool shed.
Larger systems can be expensive, even DIY, Since the cost of a complete solar installation has plummeted in recent years, it is not as cost-effective anymore to do the labor yourself.
Learning Curve
Gain valuable skills and knowledge about solar energy, Satisfaction of knowing you did it on your own.
You’ll need to learn about electrical systems and safety procedures, Build-your-own from scratch solar array requires advanced technical knowledge and expertise.
Environmental Impact
Reduce your carbon footprint, Contributing to the renewable energy transformation essential to curbing our climate crisis.
Improper installation can lead to inefficiency and safety hazards.
Personalization
Tailor your system to precisely meet your own energy needs.
Takes time, effort, and planning—from start to finish.
Safety
Working around high voltage could easily lead to accidental electrocution and possible death if you’re unlicensed, the risk of injury or death from falling may be too great.
Rebates/Incentives
Installing solar yourself could prevent you from benefiting from certain local or state rebates or incentives that you’d earn if you had employed an authorized solar company.
Prioritize Safety in Your Solar Panel Project
Electricity is not something to mess around with, damage you do to your roof will likely void the warranty on it, and insurance may not cover any resulting water or mold damage from leaks. If you’re not comfortable working with electrical systems, please hire a qualified electrician. Your safety is way more important than saving a few bucks. Don’t skip safety measures – it’s simply not worth the risk.
Remember, a successful DIY solar energy project requires thorough planning and research. Start with something small, build your confidence and skills, and then you can tackle more ambitious projects. The satisfaction of building your own sustainable energy system is well worth the effort. You’ll be saving money, reducing your impact on the environment, and feeling good about yourself in the process.
Calculating Energy Needs for Your DIY Solar Power System
Key Takeaways:
Understanding your home’s energy consumption is crucial for sizing your solar system.
Online calculators offer quick estimates, but manual calculations provide greater accuracy.
Consider factors like sunlight availability and system efficiency losses.
So, you’re ready to dive into the exciting world of DIY solar power? Fantastic! But before you start buying panels, you need to know how to calculate energy needs for a DIY home solar power system. Getting this right is essential for a system that meets your needs without breaking the bank.
Step 1: Determining Assessment of Your Home’s Energy Consumption (kWh)
First, grab your electricity bills for the past 12 months. Why a year’s worth? Because your energy use varies throughout the year. Summer air conditioning bumps things up, winter heating does the same. A full year gives you a realistic average.
Add up the total kilowatt-hours (kWh) consumed over the year. Divide by 12 to get your average monthly usage. This is your baseline. A higher number means you’ll need a larger solar system.
Step 2: Estimating the Output of Solar Panel
Now, the fun part – figuring out how much sunshine you get. You’ll want your solar panels’ output to at least match your energy consumption. This involves considering several factors:
Sunlight Hours: Websites and apps provide data on your location’s average daily sun hours. The more sunshine, the better.
Panel Efficiency: Solar panels aren’t 100% efficient. Their efficiency rating (typically around 15-20%) indicates how much sunlight they transform into electricity. Higher efficiency means fewer panels.
System Losses: Expect about a 20% loss due to wiring, inverter efficiency, and shading. This is crucial for accurate sizing.
Step 3: Performing the Precise Calculation
Let’s put it together. Here’s a simplified calculation:
I am a writer who loves renewable energy, with a focus on sustainable living, renewable energy, and eco-friendly innovation. With a passion for environmental awareness and a desire to explore the latest trends in green technology, corporate sustainability, and climate action. Through in-depth storytelling