The dream of generating your own power, shedding the shackles of ever-increasing utility bills, and achieving true energy independence isn’t just a fantasy – it’s an attainable reality for many homeowners. Understanding how to create electricity at home opens up a world of possibilities, from reducing your carbon footprint to ensuring a resilient power supply during outages. This guide dives deep into the practicalities, helping you evaluate the best options for your unique property and lifestyle.
At a Glance: Your Path to Home Power
- Assess Your Site First: Solar needs sun, wind needs speed, hydro needs water, and biomass needs waste. Your property’s natural resources dictate your best path.
- Understand Upfront Costs: Most systems require a significant initial investment, ranging from a few thousand to tens of thousands of dollars.
- Local Rules Matter: Zoning laws, permits, and even water rights can impact your choices, especially for wind and hydro.
- Balance DIY & Professional Help: While some aspects are manageable, complex installations often benefit from expert consultation and setup.
- Generators Are Backup: Remember, traditional generators provide resilience, but aren’t designed for daily, primary power generation.
Powering Up: Why Generate Your Own Electricity?
Taking control of your home’s electricity supply offers more than just bragging rights. It’s about resilience, economics, and sustainability. Imagine a power outage that doesn’t plunge your home into darkness, or monthly utility bills shrinking to a fraction of their former size. These are the tangible benefits driving the growing interest in home-generated power. For a broader overview of the various pathways to cutting your energy costs, including strategies for achieving energy freedom, you might find our comprehensive guide on How to generate home power a valuable starting point.
The core idea is simple: harness natural resources or existing waste streams to produce electricity for your household needs. This transition from consumer to producer is a journey, and like any journey, it begins with understanding your options and charting a realistic course.
Decoding Your Options: How Different Systems Work for Home Power
Generating your own electricity involves tapping into various natural or waste-based resources. Each method comes with specific requirements, costs, and benefits. Let’s break down the most viable options for home use.
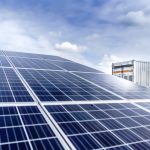
Solar Panels: Harnessing the Sun’s Abundance
Solar power remains the most popular choice for homeowners looking to create electricity at home. It’s clean, increasingly efficient, and often supported by government incentives.
- Ideal Conditions: Your property needs consistent sunlight exposure—at least four hours of peak sunlight daily on unshaded areas. A solar power company can assess your roof’s slope, direction, and shading to determine optimal efficiency.
- Types of Panels:
- Monocrystalline: Offers around 20% efficiency, making them space-saving but generally the most expensive.
- Polycrystalline: Slightly less efficient at about 16%, more affordable, but can be less effective in very high temperatures.
- Thin Film: The most flexible and cheapest option, with 7-13% efficiency, though they require the most space to generate comparable power.
- How They Work: Panels convert direct current (DC) power from sunlight into alternating current (AC) power suitable for home use via an inverter.
- Implementation Steps: This typically involves installing a mounting system (either on your roof or on the ground) and integrating inverters. While DIY is possible for experienced homeowners, professional installation is widely available and often recommended for optimal performance and safety.
- Costs & Payback: Expect an upfront cost of $15,000 to $20,000 for a typical residential system. Many electric providers offer financing options, rebates, or incentives that can significantly reduce your net investment.
- Beyond Your Needs: A fantastic benefit of solar is the ability to often sell any surplus electricity you generate back to your electric company, further offsetting costs.
Small Wind Systems: Catching the Breeze
For homes in areas with consistent wind, a small wind turbine can be an excellent way to create electricity at home, especially as a complement to solar.
- Ideal Conditions: The critical factor here is wind speed. Your property should experience an average wind speed of 14 mph (23 km/h) or more. Online maps and local airport data are good starting points for assessment.
- Zoning & Height Restrictions: This is a major hurdle for wind power. Many local zoning ordinances limit structure height (e.g., to 35 feet or 11m), but wind systems often need to be 30 feet (9.1m) higher than surrounding structures within 500 feet (150m) to be effective. Always check local regulations thoroughly.
- Sizing Your System: To calculate the minimum turbine blade diameter needed, you can use the formula: AEO = (0.01328)D^2V^3, where AEO is annual energy output in kWh/year, D is rotor diameter in feet, and V is annual average wind speed in mph.
- Acquisition & Installation: Purchase a system from a local supplier, who may also offer professional installation services.
- Costs: Budget approximately $5,120 per kilowatt (kW) of power needed.
Biomass or Biogas: Turning Waste into Watts
If your property generates a significant amount of organic waste, you might be sitting on a sustainable power source. This method is particularly suited for farms or properties with extensive landscaping.
- Ideal Conditions: This system thrives where there’s a steady supply of waste materials like wood chips, timber offcuts, paper products, old crops, sewage, or animal manure.
- How It Works: Biomass systems burn these materials directly, while biogas systems capture methane and carbon dioxide released during their decomposition. Both processes can generate energy for heating, cooling, and cooking, and with the right setup, electricity.
- Implementation Steps: You’ll need to install a specialized biomass or biogas system, often partially underground, to safely collect and process the waste off-gas. Professional consultation is highly recommended for proper sizing, regulatory compliance, and installation.
- Costs: Expect costs around $3,000 to $4,000 per kilowatt needed. While the upfront costs can be substantial, the operational costs are typically low due to the “free” fuel source.
Micro-Hydro Systems: The Power of Flowing Water
For homes lucky enough to have a consistent natural stream, micro-hydro power offers a reliable and long-lasting method to create electricity at home.
- Ideal Conditions: A property with an existing stream and dependable water flow is essential.
- Technical Assessment: You’ll need to hire a professional to accurately measure the “head” (the vertical fall distance of the water) and the “flow” (the quantity of water). These measurements are crucial for sizing the right system.
- Permits & Rights: Before anything else, obtain all necessary permits from your county. Critically, investigate water rights and potential environmental impacts, as these can be complex.
- System Sizing: Determine your required wattage, then select a micro-hydro system that generates slightly more than your typical monthly usage to ensure ample power.
- Costs & Longevity: Micro-hydro systems generally cost between $1,500 and $2,000 per kilowatt. Despite the significant initial outlay, these systems are renowned for their durability, lasting for decades with minimal maintenance.
- Smart Saving: Reducing your overall energy consumption directly lowers the kilowatts you need to generate, which in turn can significantly cut down installation costs.
Generators: Reliable Backup, Not Primary Power
While not a method to create electricity at home in the sense of renewable generation, traditional generators are vital for energy independence, serving as a critical backup power system.
- Purpose: Generators are designed to provide temporary electricity during grid outages, not as a continuous, primary power source.
- Types: Common residential options include diesel or biodiesel generators.
- Installation & Maintenance: You can choose between more affordable portable generators or opt for a permanent, often automatically switching, installed unit. Regular maintenance is key to ensure reliability.
- Considerations: Generators can be noisy, and fuel costs can accumulate quickly if used frequently. Diesel generators are typically more fuel-efficient than gasoline models, even with a slightly higher initial purchase price.
- Costs: Portable generators start around $3,000, while permanent, whole-home installations can reach up to $10,000.
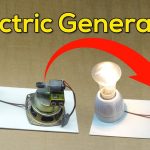
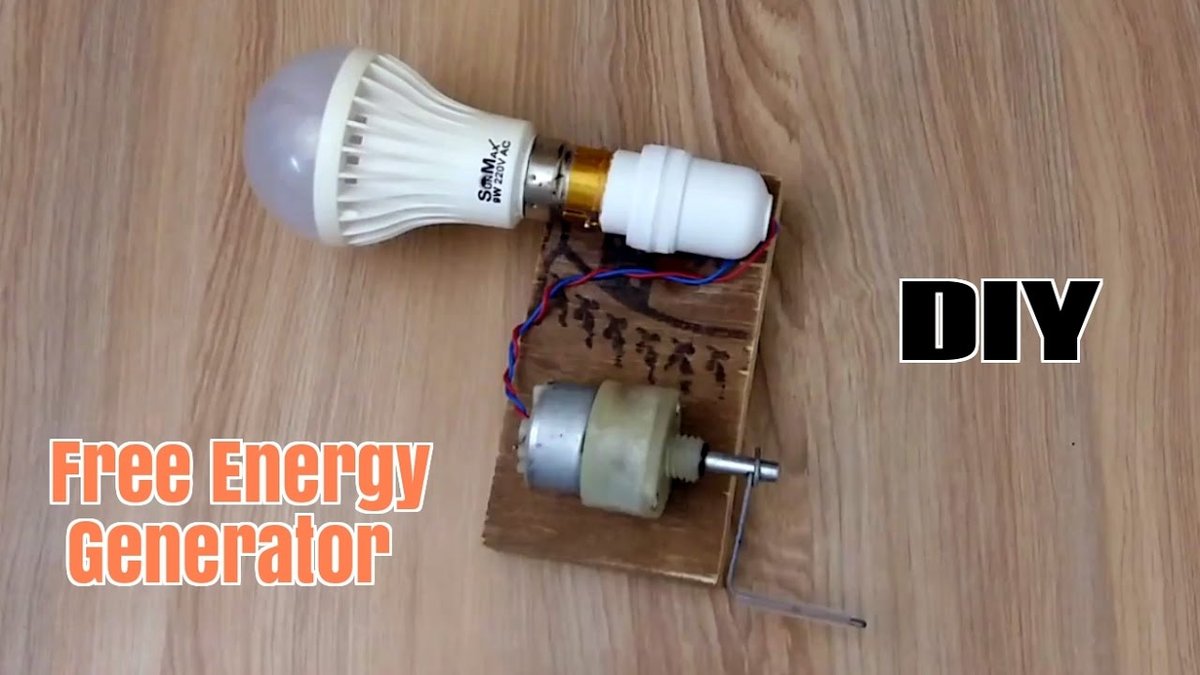
The DIY Generator: A Niche Pursuit
There’s a growing interest in building “fuel-free energy generators” at home, often popularized through online tutorials.
- Goal: These projects typically aim to construct a simple, low-power energy source using household materials.
- Perceived Benefits: Proponents often cite reduced energy bills, enhanced sustainability, zero fuel cost, and environmental friendliness.
- Reality Check: While intriguing, these DIY projects generally produce very limited power, suitable for small appliances or charging devices, rather than powering an entire home. Their claims of “fuel-free” often rely on complex principles that don’t scale to significant home electricity generation without substantial (and often unstated) inputs. Always approach such projects with realistic expectations and a focus on safety.
Your Home Energy Playbook: A Step-by-Step Implementation Guide
Deciding to create electricity at home is a significant undertaking. A structured approach ensures you make informed decisions and avoid common pitfalls.
Phase 1: Deep-Dive Research & Site Assessment
Before you buy a single panel or turbine, understand what your home can realistically support.
- Energy Audit: Start by understanding your current electricity consumption. Review past utility bills to find your average monthly kWh usage. This dictates the size of the system you’ll need.
- Resource Evaluation:
- Solar: Use online tools (e.g., Google Project Sunroof) or consult solar professionals to assess your roof’s solar potential (sun hours, shading).
- Wind: Check local airport data or online wind maps for average wind speeds at your location. Consider installing an anemometer for a few months for precise data.
- Micro-Hydro: If you have a stream, measure its “head” (vertical drop) and “flow” (volume per second). This often requires a professional.
- Biomass/Biogas: Inventory your organic waste streams—how much do you produce, and how consistently?
- Local Regulations & Zoning: This is paramount. Contact your local planning department to understand zoning restrictions for structure height (wind), setback requirements, permits needed for new construction, and environmental impact assessments (especially for hydro).
Case Snippet: The Rural Homestead
John and Mary, living on a sprawling rural property, initially considered solar. However, their property also had a strong, consistent stream. After professional assessment revealed excellent head and flow, they shifted their focus to micro-hydro, realizing it could offer 24/7 power, unlike solar which varies by daylight.
Phase 2: Planning & Permitting
Once you know what’s possible, it’s time to formalize your plan.
- Professional Consultation: For most systems, especially wind and micro-hydro, engage experienced professionals early on. They can help with precise sizing, system design, and navigating complex regulations. Solar companies typically handle this as part of their service.
- Budgeting & Financial Incentives: Get detailed quotes. Research federal, state, and local incentives (tax credits, rebates, grants). These can drastically alter the financial viability of your project.
- Permit Application: Prepare and submit all necessary applications. This can be a lengthy process, so start early. For micro-hydro, water rights investigations are crucial here.
Phase 3: System Selection & Purchase
Choosing the right components for your home energy system.
- Match to Needs & Conditions: Based on your assessment and consultations, select the type and size of system that best meets your energy needs and property conditions. Compare different panel types (monocrystalline vs. polycrystalline), turbine sizes, or hydro generator outputs.
- Supplier Vetting: Purchase equipment from reputable suppliers. Look for warranties, certifications, and positive customer reviews.
- Considering Expandability: If budget is a constraint, consider a modular system that can be expanded later (e.g., adding more solar panels).
Phase 4: Installation & Commissioning
This is where your vision becomes reality.
- Professional Installation: For safety and efficiency, professional installation is highly recommended for solar, wind, and micro-hydro systems. They ensure proper wiring, structural integrity, and adherence to codes.
- DIY Considerations: If you have significant electrical and construction experience, some simpler solar setups or small DIY generator projects might be feasible. However, always prioritize safety and local code compliance.
- Grid Connection (Net Metering): If you plan to connect to the grid and sell excess power (net metering), ensure your system is properly commissioned and approved by your utility company.
Case Snippet: Urban Solar Success
Sarah in suburban Dallas opted for a professional solar installation. Her south-facing roof was ideal, and she qualified for a federal tax credit and local utility rebate. The installation took only a few days, and within weeks, she was generating more power than she used, seeing significant reductions in her monthly bills and earning credits from her utility.
Phase 5: Maintenance & Optimization
Your journey doesn’t end with installation.
- Regular Maintenance:
- Solar: Periodically clean panels (especially after dusty periods) and inspect for damage.
- Wind: Check blades for wear, lubricate moving parts, monitor connections.
- Micro-Hydro: Clear debris from the intake, inspect for leaks, ensure proper lubrication.
- Generators: Regular oil changes, fuel checks, and test runs are essential.
- Monitor Performance: Track your system’s output and compare it to your consumption. Many systems come with monitoring apps.
- Energy Efficiency: Continue to reduce your home’s energy consumption. The less power you need, the smaller (and cheaper) your system can be, and the more “free” energy you’ll have available.
Quick Answers to Common Questions About Home Electricity Generation
Is generating electricity at home truly “free”?
While the fuel (sunlight, wind, water, waste) is free, the systems to harness them require a significant upfront investment. Over time, as you offset or eliminate utility bills, the cost-per-kilowatt-hour can become very low, making it functionally “free” after the payback period. However, initial costs, maintenance, and potential loan interest must be factored in.
What’s the easiest method to install for a typical homeowner?
Solar panels generally offer the most straightforward installation process, particularly for roof-mounted systems handled by professionals. The technology is mature, widely available, and often comes with comprehensive service packages. Wind and hydro systems face more complex site-specific challenges and regulatory hurdles.
Can I combine different methods to create electricity at home?
Absolutely! A hybrid system, like combining solar panels for daytime generation with a small wind turbine for night and cloudy days, can provide more consistent and reliable power. This approach, sometimes called “microgrid,” leverages the strengths of different resources to minimize reliance on a single source or the utility grid.
How much power can a DIY generator (like from YouTube videos) actually produce?
Most simple DIY “fuel-free” generators, like those often seen in online tutorials, are capable of generating very limited power—think enough to charge a phone, power a small LED light, or run a tiny fan. They are generally not designed nor capable of powering home appliances or entire circuits. Realistic expectations are key here; for substantial home power, proven commercial solutions are necessary.
How long do these home energy systems typically last?
- Solar Panels: High-quality panels typically come with a 25-year performance warranty, though they can continue producing power for 30 years or more.
- Small Wind Systems: With proper maintenance, wind turbines can last 20 years or more.
- Biomass/Biogas Systems: The core components can last decades with low maintenance, especially the underground elements.
- Micro-Hydro Systems: These are incredibly durable and can often last for 50 years or even longer with minimal maintenance.
- Generators: Depending on type and usage, generators can last 10-30 years with regular maintenance.
Starting Your Journey Towards Energy Independence
The prospect of taking control of your energy future by learning how to create electricity at home is exciting and empowering. Whether you’re drawn to the clean power of the sun, the steady force of the wind, the unique potential of a flowing stream, or the resourceful efficiency of turning waste into energy, the first step is always thorough assessment and informed decision-making.
Don’t rush into a system without understanding your specific needs, your property’s potential, and the local regulations that apply. Start by evaluating your energy consumption and the natural resources available to you. Consult with professionals, explore financing options, and remember that even small steps toward energy efficiency can make a big difference in the overall cost and complexity of your home power system. The path to energy independence is within reach—it just requires careful planning and a commitment to understanding the options available to you.

- Interesting Facts About Hydroelectricity Beyond Dams and Turbines - March 14, 2026
- Is Hydropower Renewable Or Nonrenewable Resource? Sorting Out the Facts - March 3, 2026
- Hydroelectric Power Basics How Water Is Used For Electricity - February 26, 2026