Of course. Here is the comprehensive pillar article on generating electricity from water at home, written in the voice of a seasoned journalist and subject-matter expert.
Imagine the constant, soothing sound of a creek running through your property. Now, imagine that gentle burble is also the sound of your lights staying on, your refrigerator humming, and your laptop charging—day and night, rain or shine. For landowners with the right water source, learning how to generate electricity from water at home isn’t just a fascinating science project; it’s a powerful path to true energy independence.
While solar panels own the spotlight and wind turbines dot the hillsides, the steady, relentless power of moving water remains one of the most reliable forms of renewable energy. Unlike its intermittent cousins, a year-round stream offers a 24/7 power source that can form the backbone of a resilient off-grid or grid-tied home. This guide is your starting point—a clear, no-nonsense look at what it really takes to turn your stream into a stream of electrons.
At a Glance: Your Micro-Hydro Cheat Sheet
Before we dive in, here’s the big picture. Grasp these core concepts, and you’ll be on the right track.
- It’s All About “Head” and “Flow.” These are the two most critical measurements. “Head” is the vertical distance the water falls, creating pressure. “Flow” is the volume of water moving over a period of time. You need a good combination of both.
- This Isn’t a Weekend DIY. A micro-hydro system is a serious infrastructure project. It requires careful planning, significant investment, and compliance with local regulations.
- Consistency is King. Micro-hydroelectric power shines because of its reliability. A consistent, year-round water source is non-negotiable for a primary power system.
- The “Fuel” is Free, but the Setup Isn’t. While you won’t be paying for water, the initial costs for the turbine, pipe, and electronics can be substantial.
- Permits Are Paramount. You don’t own the water flowing through your land. You will almost certainly need permits to divert it. Ignoring this step can lead to hefty fines and legal trouble.
Why Bet on Water? The Unsung Hero of Off-Grid Energy
In a world dominated by solar panels, why even consider hydropower? The answer lies in one word: consistency.
Solar power is fantastic when the sun is shining. Wind power is great when the wind is blowing. But what about a week of cloudy, still days in the middle of winter? A well-designed micro-hydro system keeps producing. It generates a steady, predictable baseline of power around the clock, which means you can often get by with a smaller, less expensive battery bank compared to a solar-only setup.
The benefits are compelling:
- 24/7 Power Generation: It works at night, on cloudy days, and in all seasons, as long as your stream is flowing.
- High Power Density: A small turbine can produce a surprising amount of energy. Water is 830 times denser than air, so it packs a much bigger punch.
- Long Lifespan & Low Maintenance: With few moving parts, micro-hydro systems are built to last for decades. Routine maintenance usually just involves clearing debris from the intake screen.
- Energy Independence: You create your own power on your own property, freeing you from utility bills and grid instability.
First Things First: Can Your Property Actually Support a Hydro System?
This is the make-or-break stage. Enthusiasm is great, but a hydro system runs on physics and legal rights, not dreams. Before you spend a dime, you need to rigorously assess your site’s potential.
Measuring “Head” and “Flow”: The Two Numbers That Rule Everything
All the power in your system comes from two factors: the pressure of the water (Head) and the amount of it (Flow).
Head is the vertical elevation change between where the water enters your pipe (the intake) and where it hits your turbine. Think of it like water pressure. A taller water tower creates more pressure at the tap; a greater vertical drop creates more power for your turbine. You can measure it with a GPS, a surveyor’s transit, or even a simple string level and a friend over a longer distance. It’s measured in feet or meters.
Flow is the volume of water your stream provides. It’s typically measured in gallons per minute (GPM) or liters per second. The easiest way to estimate flow on a small stream is the “bucket and stopwatch method.”
- Build a temporary dam to channel the stream’s entire flow into a pipe or trough.
- Place a bucket of a known size (e.g., a 5-gallon bucket) under the outlet.
- Time how long it takes to fill the bucket.
- If it takes 10 seconds to fill a 5-gallon bucket, your calculation is:
(5 gallons / 10 seconds) x 60 seconds/minute = 30 GPM.
Crucially, you must measure your flow during the driest time of the year (late summer or fall). A roaring spring creek that dwindles to a trickle in August won’t sustain a year-round system.
A Quick Power Estimate
Once you have your Head and Flow, you can do a rough calculation of your potential power. A widely used formula for a quick estimate is:
Power (Watts) ≈ [Head (in feet) x Flow (in GPM)] / 10
This formula accounts for typical system inefficiencies. It’s an estimate, not a guarantee.
Real-World Example:
You have a vertical drop (Head) of 40 feet. Your lowest measured flow (Flow) is 50 GPM.Power ≈ (40 ft x 50 GPM) / 10 = 200 Watts
That’s 200 watts, 24 hours a day. That’s 4,800 watt-hours (4.8 kWh) per day—enough to power a small, efficient off-grid cabin.
The Legal Lowdown: Water Rights and Permitting
This is the step everyone wants to skip, and the one that can derail your entire project. You cannot simply dam or divert a stream without permission. Waterways are governed by a complex web of local, state, and federal regulations.
Before you go any further, contact:
- Your local county planning or building department.
- Your state’s Department of Fish and Wildlife (or equivalent).
- Your state’s water resources board or environmental quality department.
- In the U.S., potentially the Army Corps of Engineers for any work in navigable waters.
Be prepared for a lengthy process. They will want to know about potential impacts on fish, wildlife, and downstream users. Gaining the proper permits is a sign of a responsible, sustainable project.
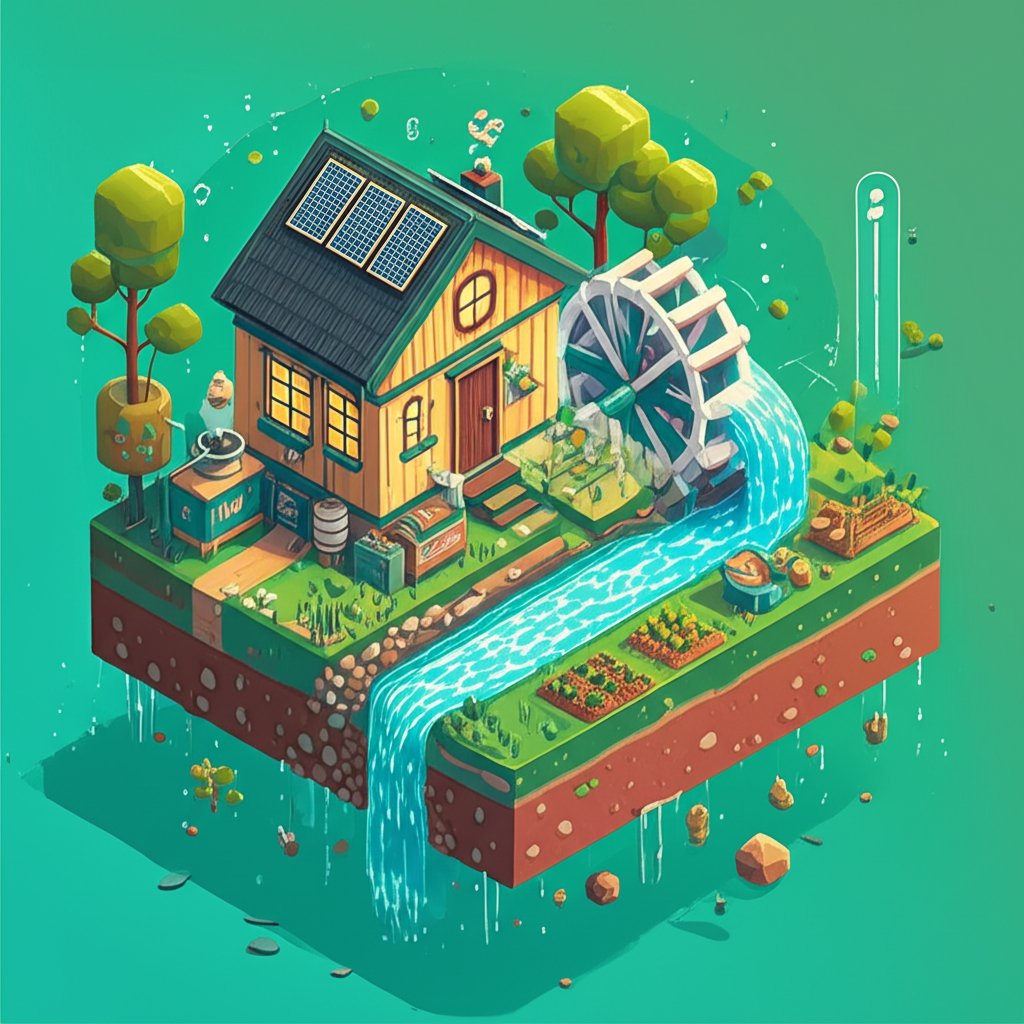
The Anatomy of a Micro-Hydro System: Your Key Components
A micro-hydro system is an elegant collaboration of simple parts. Water flows in, spins a wheel, and electricity comes out. Here’s a breakdown of the core components.
| Component | Function | Why It’s Important |
|---|---|---|
| Intake | Diverts a portion of the stream’s flow into the pipe. | A good intake filters out leaves, rocks, and other debris that could damage your turbine. It’s often just a screened-off catch basin. |
| Penstock | The pipeline that carries the water from the intake down to the turbine. | This is the system’s artery. It needs to be sized correctly and be as smooth and straight as possible to minimize energy loss from friction. Usually made of PVC or HDPE pipe. |
| Turbine & Generator | The heart of the system. High-pressure water strikes the turbine, causing it to spin a shaft connected to a generator. | This is where the magic happens-converting the water’s kinetic energy into rotational energy, and then into electrical energy. |
| Controller | Manages the electricity coming from the generator. | Prevents the batteries from overcharging by diverting excess power to a “dump load” (like a water heater element or space heater). |
| Battery Bank | Stores the electricity for later use. | Deep-cycle batteries allow you to store power and handle peak loads that exceed the turbine’s real-time output. |
| Inverter | Converts the DC electricity from the batteries into AC electricity for your home. | This turns stored power into the same type of power you get from the grid, allowing you to run standard appliances. |
Choosing the Right Turbine
Not all turbines are created equal. The type you need depends entirely on your site’s Head and Flow characteristics.
- Pelton & Turgo Turbines (High-Head, Low-Flow): These are “impulse” turbines. They work like a water wheel, with jets of high-pressure water striking a series of “buckets.” They are perfect for sites with a lot of vertical drop but not necessarily a huge amount of water.
- Cross-flow & Banki Turbines (Low-to-Medium Head, Medium-to-High Flow): These are slower-moving turbines that look like a hamster wheel. Water flows through the blades twice, making them efficient across a wide range of flow conditions.
- Propeller Turbines (Very Low-Head, High-Flow): These work like a boat propeller in reverse. They are suited for sites with very little vertical drop but a large volume of water, like a slow-moving river.
Sizing Your System: How Much Power Do You Really Need?

Before you can build, you need a target. Don’t just guess your power needs—calculate them.
Step 1: Conduct an Energy Audit
Create a simple list of every electrical device you plan to use. For each one, find its wattage (usually on a sticker on the device) and estimate how many hours per day you’ll use it.
| Appliance | Power (Watts) | Daily Hours of Use | Daily Energy (Watt-hours) |
|---|---|---|---|
| LED Lights (5) | 50 W | 4 hrs | 200 Wh |
| Refrigerator | 150 W | 8 hrs (cycle time) | 1,200 Wh |
| Laptop Charger | 65 W | 5 hrs | 325 Wh |
| Well Pump | 750 W | 0.5 hrs | 375 Wh |
| Total Daily Need | 2,100 Wh or 2.1 kWh |
Step 2: Plan for Peak Demand
Your total daily need is one thing; your instantaneous or “peak” need is another. In the example above, if the 750W well pump and the 150W refrigerator kick on at the same time, your system needs to supply at least 900 watts at that moment. Your inverter must be sized to handle this peak load.
This audit tells you what your micro-hydro system needs to produce daily and what your battery and inverter system must be capable of delivering on demand.
From Plan to Power: The Construction Journey
The process to Generate power from home water is a significant undertaking, but breaking it down into phases makes it manageable. This is a high-level overview, not a detailed construction manual. Always prioritize safety and consult with experts.
- Site Preparation: Clear the path for your penstock. The straighter and more direct, the better. Prepare a level, stable pad for your “powerhouse”—the small shed that will protect your turbine, generator, and electronics from the elements.
- Intake Construction: Build your diversion and screening system at the highest point. Ensure it’s robust enough to handle spring floods and includes a way to prevent fish from entering the pipe (a legal requirement in many areas).
- Laying the Penstock: This is often the most labor-intensive part. You’ll need to connect sections of pipe, bury it where possible to protect it from sun and damage, and ensure it’s securely anchored, especially at bends.
- Powerhouse Setup: Install the turbine and generator, connecting them to the end of the penstock with a valve for shutdown. Wire the generator to the charge controller, battery bank, and inverter according to manufacturer specifications. This is where hiring a qualified electrician is non-negotiable.
Micro-Hydro Mythbusting & FAQs
Let’s clear up some common questions and misconceptions.
Do I need a big dam?
No. The vast majority of home-scale systems are “run-of-river.” They divert only a portion of the stream’s flow and don’t require a dam or reservoir. This dramatically reduces the cost and environmental impact.
How much does a micro-hydro system cost?
This varies wildly, but it’s a significant investment. A complete, professionally installed system can range from $6,000 to over $25,000, depending on the power output, penstock length, and complexity. DIY kits can be cheaper, but they require a high degree of skill.
What kind of maintenance is required?
It’s surprisingly minimal. The main task is regularly checking the intake screen and clearing away leaves or debris. You’ll also want to periodically inspect the penstock for leaks and check the turbine’s bearings for wear once a year.
What happens when it freezes?
A valid concern. In cold climates, intakes must be deep enough to avoid surface ice. The moving water inside the penstock is less likely to freeze, but you may need to plan for system shutdowns during the absolute coldest parts of winter.
Can I connect my system to the grid?
Yes, this is known as “grid-tying.” It allows you to draw power from the grid when you need it and sell your excess power back to the utility company (net metering). This requires a more complex, grid-compliant inverter and a professional inspection to ensure safety and code compliance.
Your Next Step Toward Water-Powered Independence
Harnessing the power of a stream is one of the most elegant and rewarding ways to generate your own clean energy. It’s a testament to working with nature, not against it. But it’s also a serious engineering project that demands respect, research, and careful planning.
Your journey doesn’t start with buying a turbine. It starts with a walk along your creek, a 5-gallon bucket, and a stopwatch.
- Assess Your Site: Walk your property from the potential intake location to the powerhouse site. Is the path for a penstock feasible?
- Take Your Measurements: Get a solid, conservative estimate of your Head and, most importantly, your minimum (dry season) Flow.
- Do Your Legal Homework: Start making calls about water rights and permits. This process can take months, so start early.
- Consult the Pros: Reach out to micro-hydro suppliers and installers. They have a wealth of experience and can help you verify your measurements and select the right components for your unique site.
The quiet, constant energy flowing through your land is a resource of immense value. With the right approach, you can transform that natural power into a clean, reliable, and independent future for your home.

- Is Hydropower Renewable Or Nonrenewable Resource? Sorting Out the Facts - March 3, 2026
- Hydroelectric Power Basics How Water Is Used For Electricity - February 26, 2026
- Portable Water Generators Power Off-Grid Homes and Adventures - February 25, 2026