That stream burbling at the edge of your property is more than just a scenic feature—it’s a potential 24/7 power plant. For anyone serious about off-grid living or energy independence, learning how to make electricity at home with water is a game-changer, transforming the steady energy of flowing water into reliable, clean power for your home. Unlike solar or wind, which are intermittent, a well-designed micro-hydro system can deliver consistent power day and night, rain or shine.
This guide is your hands-on manual. We’ll skip the high-level theory and dive straight into the practical steps, decisions, and common pitfalls of building your own micro-hydroelectric system.
Assess Your Site’s Potential: Quickly measure your water’s “head” and “flow”—the two critical factors that determine how much power you can generate.
Understand the Core Components: Demystify the key parts of a hydro system, from the intake screen and penstock pipe to the turbine and generator.
Choose the Right Turbine: Compare common DIY-friendly turbine designs (Pelton, Turgo, and Cross-flow) to match your specific water source.
Follow a Step-by-Step Build Plan: Get a practical playbook for constructing, assembling, and commissioning your system safely.
Calculate Your Power Needs: Determine how much electricity you actually use to ensure your system is sized for your lifestyle.
Avoid Costly Beginner Mistakes: Learn to sidestep common issues like undersized pipes and improper site selection.
Before You Build: Gauging Your Water Resource Potential
Success with a micro-hydro project hinges on the characteristics of your water source. Before you buy a single component, you need to measure two key metrics: Head and Flow. Power is a direct product of these two variables—if one is low, the other needs to be high to compensate.
Measuring “Head”: The Power of Vertical Drop
“Head” is simply the vertical distance the water falls from your intake point to your turbine. Gravity is your engine here, and more head equals more pressure, which means more power.
What it is: The vertical elevation change, measured in feet or meters.
How to Measure It (DIY Method): Grab a friend, a long garden hose, and a measuring tape. Run the hose from your proposed intake point down to the turbine location, ensuring the hose is full of water and free of bubbles. Lift the downstream end of the hose until the water stops flowing. The vertical distance from the ground to the end of the hose is your static head. For a less hands-on approach, a smartphone’s altimeter app or a GPS device can give you a decent estimate over a longer distance.
Even a small drop of 5 feet can work for certain turbine types, but systems become much more effective with 20 feet of head or more.
Calculating “Flow Rate”: The Volume That Drives Your Turbine
“Flow” is the volume of water moving through your stream over a specific time, usually measured in gallons per minute (GPM) or liters per second.
What it is: The quantity of water available to do work.
How to Measure It (The Bucket Method): This is the simplest, most reliable way to measure flow for a small stream.
Build a temporary dam to channel all the water through a pipe or trough.
Place a bucket of a known size (e.g., a 5-gallon bucket) under the outlet.
Using a stopwatch, time how long it takes to fill the bucket.
Calculate your GPM: (Bucket Size in Gallons / Time in Seconds) x 60
Real-World Example: If your 5-gallon bucket fills in 10 seconds, your flow rate is (5 / 10) x 60 = 30 GPM.
Remember to measure flow at different times of the year. Your lowest flow rate (typically in late summer) is your most important number for system design.
The Power Formula: A Quick Back-of-the-Envelope Calculation
Once you have your head and flow, you can estimate your potential power output. This simple formula accounts for typical system inefficiencies (around 50-60%) and gives you a realistic wattage figure. Power (Watts) ≈ Head (feet) x Flow (GPM) / 10 Case Snippet: An off-grid homesteader, Sarah, measured her creek. She found a usable head of 30 feet and a consistent low-season flow of 40 GPM. Her calculation: (30 x 40) / 10 = 120 Watts. This doesn’t sound like much, but running 24/7, it produces 2,880 watt-hours (2.88 kWh) per day—more than enough to power an efficient fridge, LED lights, a laptop, and charge phones.
Your System’s Core Components, Demystified
A micro-hydro system is a chain of components that work together to capture, convert, and store energy. While this article focuses on the DIY build, you can get a complete overview of all options for generating Off-grid power from water in our main guide.
Here’s a breakdown of the essential parts you’ll be working with.
The Intake and Penstock: Guiding the Water
This is the plumbing part of your system. The intake is a simple screened box or diversion that channels a portion of the stream’s water into your pipe while filtering out leaves, rocks, and fish.
The penstock is the pipe that carries the water from the intake down to the turbine. This is a critical component where mistakes are often made.
Material: High-density polyethylene (HDPE) or PVC pipe are common choices. HDPE is more durable and flexible but also more expensive.
Sizing is Crucial: The biggest mistake DIYers make is using a pipe that’s too small. An undersized penstock creates massive friction, which robs the water of pressure (and thus, power) before it even reaches the turbine. As a rule of thumb, for flows up to 50 GPM, a 2-inch pipe is a bare minimum; 3-inch is better. Always consult a friction loss chart for your specific flow rate and pipe length.
The Heart of the System: The Turbine and Generator
This is where the magic happens. The turbine converts the energy of moving water into rotational mechanical energy. The generator (often a Permanent Magnet Alternator or PMA) is connected to the turbine’s shaft and converts that rotation into electricity.
Choosing the right turbine depends entirely on your site’s head and flow characteristics.
Turbine Type
Best For
DIY Complexity
How It Works
Pelton Wheel
High Head, Low Flow (>50 ft, <30 GPM)
Moderate
A high-pressure jet of water strikes a series of “cups” on the wheel.
Turgo Wheel
Medium Head, Medium Flow (15-100 ft)
Moderate
An angled jet strikes the blades, allowing water to exit freely.
Cross-flow
Low Head, High Flow (<20 ft, >60 GPM)
High
Water flows through a “squirrel cage” shaped runner, striking blades twice.
For most DIY projects with decent head, a Pelton or Turgo wheel offers the best balance of efficiency and build simplicity.
The “Brains”: Electronics for Power Management
You can’t just connect a generator to your appliances. You need a system to manage and store the power.
Charge Controller: A micro-hydro system produces power 24/7. A charge controller’s job is to prevent your batteries from overcharging. Unlike a solar controller, a hydro controller must use a “diversion load” (also called a “dump load”). When the batteries are full, it diverts the excess electricity to a secondary load, like a water heating element or a resistor bank, to keep the generator under a constant, safe load.
Battery Bank: This is where you store your energy. Deep-cycle batteries (either flooded lead-acid, AGM, or lithium) are essential. The size of your bank determines how long you can run your home without any power generation.
Inverter: Your system produces and stores DC electricity, but your home appliances run on AC. The inverter converts the DC power from the batteries into usable 120V or 240V AC power.
From Creek Bed to Live Current: A 5-Step Build Guide
This practical playbook outlines the major phases of building your own system for making electricity at home with water. Safety is paramount—you are working with water, electricity, and potentially heavy components.
Step 1: Finalize Your Site and Secure Permits
Before you dig, confirm your legal right to use the water. Contact your local county, water board, or environmental agency. Unpermitted water diversion can lead to significant fines. Clarify rules regarding fish screens, minimum in-stream flow requirements, and any necessary building permits.
Step 2: Construct the Intake and Lay the Penstock
Your intake should be sturdy and placed in a stable part of the stream. A small wing dam made of rocks or concrete can help channel water into it. Anchor your penstock securely every 10-20 feet to prevent movement and sagging, which can cause airlocks. Burying the penstock is ideal for protection and temperature stability.
Step 3: Assemble the Turbine and Generator Housing
Your turbine needs a solid, level foundation (a concrete pad is best) and a weatherproof enclosure. This “powerhouse” protects your expensive equipment from the elements. Meticulously align the penstock’s nozzle with your turbine—even a slight misalignment can drastically reduce efficiency.
Step 4: Wire the Electronics
Follow a logical and safe wiring sequence. The system should be completely de-energized (water off, no batteries connected) during this phase.
Connect the generator’s output wires to the charge controller’s “input” terminals.
Connect the charge controller’s “diversion load” terminals to your dump load.
Connect the charge controller’s “battery” terminals to your battery bank, starting with the positive lead. Always install a fuse or circuit breaker between the controller and the batteries.
Finally, connect the inverter to the battery bank.
Use correctly sized wires for all connections to prevent overheating and voltage drop.
Step 5: Commissioning and Testing
This is the moment of truth.
Double-check all plumbing and electrical connections.
Open the intake valve (the “head gate”) very slowly, letting the penstock fill gradually to avoid water hammer.
Listen for the turbine to spin up. Check for any leaks in the system.
Using a multimeter, check the voltage and amperage coming from the generator.
Watch the charge controller’s display to confirm it’s reading the battery voltage and beginning to charge. Once the batteries are full, verify that it successfully diverts power to the dump load.
Answering Your Top Micro-Hydro Questions
Here are some quick answers to the most common questions and concerns aspiring DIY hydro builders have. Q: Can I really do this myself if I’m not an engineer?
A: Absolutely, especially for systems under 500 watts. If you have solid DIY skills in basic plumbing, fabrication, and 12V electrical work, you can successfully build a “pico-hydro” system. Start small. A tiny system that lights up an LED is a great way to learn the principles of how to make electricity at home with water before scaling up. Q: What’s the biggest mistake DIY builders make?
A: Undersizing the penstock. It’s the most common and costly error. The desire to save money on a smaller pipe leads to massive power loss from friction. When in doubt, always go up one pipe size. The extra cost is minimal compared to the lost wattage over the system’s lifetime. Q: Do I have to build a big dam?
A: No. Nearly all modern micro-hydro systems are “run-of-river.” This means they only divert a portion of the stream’s flow and return it downstream after it passes through the turbine. This approach has a very low environmental impact and avoids the complex engineering and permitting required for a dam. Q: What kind of maintenance is involved?
A: Micro-hydro systems are famously reliable, but not zero-maintenance. Plan on a weekly check of the intake screen to clear leaves, especially in the fall. Perform a semi-annual inspection of the penstock for leaks and check the turbine’s bearings for wear.
Making Your DIY Hydro Project a Reality
Turning the potential energy in a stream into usable power for your home is one of the most rewarding off-grid projects you can undertake. It offers a level of energy security and consistency that is hard to match. The key is to start with a realistic assessment of your resources and a healthy respect for the power of water and electricity.
Before you start pricing out turbines, run through this final checklist.
Your Quick-Start Action Plan
Confirm Your Resource: Do you have year-round water flow? Can you identify a practical intake location and turbine site that provides at least 5-10 feet of vertical drop (head)?
Calculate Your Potential: Use the Head (ft) x Flow (GPM) / 10 formula. Is the resulting wattage figure useful for your goals? (Even 50 continuous watts can be incredibly valuable).
Check Local Regulations: Make the call. Find out what your local authorities require for small-scale hydro. This step is non-negotiable.
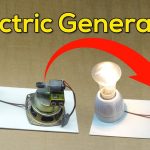
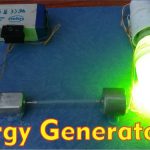
Build a Proof-of-Concept: Start with a tiny tabletop experiment. Use plastic spoons, a small DC motor, and an LED. Proving the principle on a small scale will build the confidence and understanding needed to tackle the full-sized project.
I am a writer who loves renewable energy, with a focus on sustainable living, renewable energy, and eco-friendly innovation. With a passion for environmental awareness and a desire to explore the latest trends in green technology, corporate sustainability, and climate action. Through in-depth storytelling