Imagine a life where your electricity meter barely spins, or even runs backward, and your monthly energy bill shrinks to a fraction of what it once was—or vanishes entirely. This isn’t a pipe dream; for many homeowners, learning how to make free electricity to run your home using the power of nature is a tangible goal. It’s about leveraging the sun, wind, water, or even your organic waste to power your daily life, giving you control over your energy future, reducing your environmental footprint, and potentially putting money back in your pocket.
This guide dives deep into the practicalities of various renewable home electricity systems, helping you assess which might be the best fit for your property and lifestyle. We’ll explore the specifics, from site suitability to costs and installation, so you can make informed decisions on your path to energy independence.
Site-Specific Decisions: Your property’s natural resources (sunlight, wind, water, waste) dictate the most suitable renewable system.
Upfront Investment, Long-Term Savings: Most systems require a significant initial outlay, but offer decades of reduced or eliminated electricity bills.
Professional Assessment is Key: Accurate measurements (sun exposure, wind speed, water flow) and structural evaluations are crucial for efficiency and safety.
Zoning & Permits: Local regulations often govern alternative energy installations; always check first.
Combine for Resilience: Integrating multiple renewable sources can provide more consistent power generation.
Generators for Backup: While not “free electricity,” generators offer crucial backup during outages.
Laying the Foundation: Assessing Your Home’s Potential
Before committing to any system, a thorough assessment of your property is essential. This isn’t just about what you want to install, but what your environment can realistically support. Thinking about your home’s energy needs and available natural resources is the first critical step in understanding how to make free electricity to run your home.
Many homeowners find it beneficial to begin with a broad understanding of the options available for cutting electricity bills and generating power. For a more comprehensive look at all the strategies, including energy efficiency and reducing consumption, our pillar guide on Generate free home electricity offers a great starting point.
Now, let’s dig into the specific renewable energy technologies that can transform your home into a self-sufficient power hub.
Harnessing the Sun: Solar Panel Systems
Solar panels are perhaps the most recognized symbol of home-based renewable energy. They convert sunlight directly into electricity, making them a popular choice for many.
Is Solar Right For You? Site Suitability for Panels
To maximize solar panel efficiency, your property needs to receive at least 4 hours of peak sunlight daily. This means identifying large, unshaded areas, typically on your roof, that face the sun for a significant portion of the day. Trees, neighboring buildings, or even architectural features can cast shadows, dramatically reducing a panel’s output. Professional consultations are invaluable here, as they can assess your roof’s slope, direction, and potential shading issues to determine the optimal setup.
Understanding Solar Panel Types
Not all solar panels are created equal; understanding the types helps you balance efficiency, cost, and space requirements.
Monocrystalline Panels: These are the most efficient, typically around 20%. Made from a single crystal structure, they have a sleek, uniform look and are ideal where space is limited. However, their superior performance comes with the highest price tag.
Polycrystalline Panels: A more budget-friendly option, polycrystalline panels offer about 16% efficiency. They are made from multiple silicon crystals, giving them a slightly speckled appearance. While more affordable, they tend to perform less efficiently in high temperatures due to lower heat tolerance.
Thin-Film Panels: The most flexible and cheapest option, thin-film panels boast 7-13% efficiency. They are lightweight and can be adapted to various surfaces. The trade-off is that they require the most space to generate the same amount of power as higher-efficiency panels.
Getting Solar Installed
Installing a solar panel system involves two main components: the panels themselves and inverters. Panels generate Direct Current (DC) electricity from sunlight. Inverters then convert this DC power into Alternating Current (AC) power, which is what your home appliances use.
Installation typically starts with a mounting system, either on your roof or a ground-based rack. While DIY kits exist, professional installers ensure optimal angle, secure mounting, and correct electrical wiring, adhering to safety codes. They also handle the necessary permitting and grid connection processes.
The Solar Investment
The average upfront cost for a home solar system ranges from $15,000 to $20,000. This can be a substantial sum, but various financing options, state rebates, and federal tax incentives are often available to help offset the initial expense. A significant benefit is the potential to sell any excess electricity generated back to your utility company through “net metering,” further reducing your bills and potentially creating a credit. Case Snippet: A family in Arizona, leveraging federal tax credits and state incentives, installed a $18,000 monocrystalline solar system. With 6+ hours of peak sun daily, they now generate almost all their electricity, sending excess power back to the grid and receiving monthly credits, effectively making their electricity bill disappear.
Riding the Wind: Small Wind Systems
For properties with consistent breezes, a small wind turbine can be an excellent way to make free electricity to run your home. Unlike solar, wind can generate power day or night, as long as the wind is blowing.
Is Wind Right For You? Site Suitability for Turbines
Wind systems demand specific site characteristics. You need a flat area with few tall buildings or obstructions to ensure smooth, uninterrupted wind flow. Crucially, your location must have an average wind speed of 14 mph (23 km/h) or more. Local zoning approval for structure height is also mandatory; systems often need to be 30 feet (9.1 meters) higher than the tallest structure within 500 feet (150 meters) to capture optimal wind. For instance, a common maximum height might be 35 feet (11 meters).
Calculating Your Wind Power Potential
To size your system, you need to calculate the minimum rotor diameter based on your energy needs and average wind speed. The formula is: AEO = (0.01328)D^2V^3
Where:
AEO = Annual Energy Output in kWh/year (your home’s yearly electricity consumption)
D = Rotor Diameter in feet
V = Annual Average Wind Speed in mph Example: If your home needs 11,000 kWh/year and your average wind speed is 20 mph, you’d calculate for D. A rotor diameter of approximately 10 feet (3.0 meters) would be required. This formula helps ensure you install a system appropriately sized for your needs.
Getting Wind Installed
Once you’ve determined suitability and size, the process involves purchasing and installing the turbine. This is a complex task requiring specialized knowledge for safe and efficient operation, especially concerning tower erection and electrical connections. Professional installers are highly recommended to ensure compliance with structural and electrical codes, as well as local zoning requirements.
The Wind Investment
The cost for a small wind system averages around $5,120 per kilowatt of generating capacity needed. While the initial investment is significant, the lifespan of these systems, combined with consistent energy generation in windy areas, offers substantial long-term savings.
Harnessing Waste: Biomass or Biogas Systems
If your property generates a significant amount of organic waste, turning that into energy can be a remarkably sustainable way to make free electricity to run your home. This method converts waste into usable heat and power.
Is Biomass/Biogas Right For You? Site Suitability for Waste-to-Energy
Biomass and biogas systems are ideal for properties that produce substantial amounts of organic waste materials. This includes wood chips, timber offcuts, paper products, old crops, sewage, or animal manure. The availability of a consistent supply of these materials is fundamental to the system’s viability.
The Biomass/Biogas Process
The core of these systems involves taking organic waste and processing it to create energy. In a biogas system, waste materials decompose anaerobically (without oxygen) to produce methane and carbon dioxide. These gases can then be burned for heating, cooling, cooking, and generating electricity. Burning methane in a controlled biogas system is environmentally preferable to allowing it to release directly into the atmosphere, where it acts as a potent greenhouse gas. For direct energy generation, biomass burning (combusting solid organic matter) is generally more efficient than composting.
Getting Biomass/Biogas Installed
These systems can vary greatly in size and complexity, from small backyard digesters to larger integrated units. They are typically partially underground, designed to collect and process waste while safely burning off-gases for power. Given the specialized nature of these installations, a professional assessment is highly recommended. Experts can evaluate your waste stream, energy needs, and site conditions to design an efficient and compliant system.
The Biomass/Biogas Investment
Expect costs around $3,000-$4,000 per kilowatt of generating capacity. The upfront cost represents the primary expense, as these systems generally have low ongoing maintenance costs, especially if you have a ready supply of waste materials.
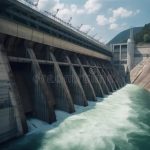
Capturing Flow: Micro-Hydro Systems
For those lucky enough to have a suitable stream running through their property, micro-hydro systems offer a consistent, clean energy source. This method converts the kinetic energy of flowing water into electricity.
Is Micro-Hydro Right For You? Site Suitability for Water Power
The critical requirement for a micro-hydro system is a property with an existing stream that has sufficient water flow. This isn’t just any babbling brook; it needs enough volume and drop to generate power.
Key Requirements: Head, Flow, and Permits
A professional inspection is absolutely essential to accurately measure two critical parameters:
“Head”: This is the vertical distance the water falls from your intake to your turbine. More head generally means more potential energy.
“Flow”: This is the quantity of water moving through the stream, typically measured in gallons or liters per minute. More flow means more power.
Beyond technical measurements, local county permits, extensive water rights research, and an environmental impact assessment are mandatory. Water usage regulations are strict, and you must ensure your system doesn’t negatively impact the environment or downstream users.
Getting Micro-Hydro Installed
Micro-hydro systems come in various sizes, from small “pico” systems for basic needs to larger setups. The installation process involves diverting a portion of the stream’s flow to a turbine, then returning the water to the stream. You’ll choose a system that generates slightly more watts than your monthly home consumption to ensure adequate power. Due to the civil engineering and electrical work involved, professional installation is strongly advised.
The Micro-Hydro Investment
Costs typically range from $1,500-$2,000 per kilowatt. While the upfront cost can be significant, micro-hydro systems are renowned for their longevity, often lasting decades with minimal maintenance once installed correctly. A smart strategy to reduce initial costs is to first focus on lowering your overall energy consumption, which reduces the kilowattage you need to generate.
Generators: For When “Free” Isn’t Constant (Backup Only)
While the focus is on how to make free electricity to run your home, it’s important to discuss generators in context. They are a valuable component of an energy-independent lifestyle, but primarily as a backup electricity source, not a primary “free” power generator.
Purpose of Generators
Generators kick in when your main power source (utility or renewable) fails, ensuring continuity for essential services. They provide peace of mind during outages.
Types and Characteristics
Portable Generators: These are movable units, ideal for temporary power needs or smaller homes. Costs range from $3,000-$10,000. They are simple to maintain but can be noisy and require manual setup during an outage.
Permanent Installations (Standby Generators): These are larger units hardwired into your home’s electrical system, automatically turning on when utility power is lost. They also cost $3,000-$10,000 for the unit itself, plus installation.
Fuel Types: Both diesel and biodiesel models are available. Diesel generators are generally more fuel-efficient and, despite a slightly higher initial cost compared to gas-powered options, often justify it through lower long-term fuel expenses.
Keep in mind that generators require fuel, so while they provide crucial backup, they do not contribute to generating “free” electricity. Their cost comes from initial purchase and ongoing fuel consumption.
The Practical Playbook: Making Your Decision
Deciding which renewable energy system (or combination) is right for you boils down to a few key steps:
Assess Your Resources:
Sunlight: Map shaded and unshaded areas on your property, especially roof space. How many hours of direct sun do you get daily?
Wind: Research average wind speeds in your exact location. Are there significant obstructions? Check local zoning for height restrictions.
Water: Do you have a year-round stream with measurable head and flow? Are water rights and permits feasible?
Waste: Do you consistently generate significant organic waste (animal manure, crops, wood waste)?
Calculate Your Needs: Review past electricity bills to understand your average monthly and annual kilowatt-hour (kWh) consumption. This helps size any system accurately.
Research Local Regulations and Incentives:
Zoning Laws: Crucial for wind turbines and micro-hydro.
Permits: Necessary for all installations.
Rebates & Tax Credits: Federal, state, and local programs can significantly reduce upfront costs for solar and sometimes other systems.
Net Metering: Understand if your utility buys back excess power.
Get Professional Consultations: For solar, wind, biomass, and micro-hydro, professional site assessments are non-negotiable. They provide accurate data, recommend appropriate systems, and ensure safe, compliant installation.
Compare Costs vs. Savings: Factor in upfront costs, financing options, potential incentives, and estimated long-term savings on electricity bills. Consider the system’s lifespan and maintenance requirements. Pro Tip: Combining solar and wind power can be a powerful strategy. Solar performs best during sunny days, while wind often picks up during cloudy weather or at night, providing a more consistent and resilient power supply.
Quick Answers: Common Questions About Home Renewable Energy
“Is ‘free electricity’ truly free after installation?”
Once the initial investment is paid off, the electricity generated by renewable sources like solar, wind, or hydro is effectively “free” from fuel costs. You’ll still have minimal ongoing maintenance costs, but the significant variable expense of utility bills is eliminated or drastically reduced.
“How long does it take to recoup the initial investment?”
The payback period varies significantly based on the system type, local electricity rates, available incentives, and your energy consumption. Solar systems, with good incentives, often see payback periods of 5-10 years. Other systems can take longer but offer decades of power once paid off.
“Can I really go completely ‘off-grid’?”
Yes, it’s possible to go off-grid, but it requires careful planning, often a combination of renewable sources, and substantial battery storage. Going off-grid typically increases the upfront cost due to the need for larger generation capacity and robust battery banks, plus possibly a backup generator.
“What if I don’t have ideal conditions for any single system?”
Many homeowners find success with a hybrid approach. For instance, combining a smaller solar array with energy-efficiency upgrades and a reliable generator for backup can still drastically reduce your reliance on the grid and cut bills, even if you can’t install a full-scale wind turbine or hydro system.
Your Next Step Towards Energy Independence
Making free electricity to run your home is a journey that begins with a clear understanding of your property’s unique potential. Don’t be overwhelmed by the initial investment or the technical details; think of it as a long-term investment in your home’s value, your financial future, and a cleaner planet.
Start by assessing your site for solar, wind, water, or waste suitability. Then, reach out to professional contractors and electricians who specialize in renewable energy installations in your area. They can provide detailed evaluations, help navigate local zoning laws, and guide you through the process, ensuring your journey to energy independence is smooth and successful. Every kilowatt-hour you generate yourself is a step toward greater control and freedom from escalating utility costs.
I am a writer who loves renewable energy, with a focus on sustainable living, renewable energy, and eco-friendly innovation. With a passion for environmental awareness and a desire to explore the latest trends in green technology, corporate sustainability, and climate action. Through in-depth storytelling