Imagine flicking a light switch, boiling water for coffee, or charging your devices, knowing the power comes directly from your backyard, not a distant utility plant. This isn’t just a dream; mastering how to produce free electricity at home using renewable sources is increasingly a tangible reality for homeowners willing to invest in their energy independence. It’s about leveraging the earth’s natural bounty—sun, wind, water, or even organic waste—to power your life and significantly slash your monthly utility bills.
This guide will dive deep into the practicalities of making your home a self-sufficient energy hub, breaking down the requirements, costs, and steps for each renewable solution.
At a Glance: Your Path to Home Energy Independence
Site Assessment is Key: Before any investment, understand your property’s specific resources—sunlight, wind speed, water flow, or organic waste availability.
Solar is Versatile: Panel types (monocrystalline, polycrystalline, thin-film) offer efficiency and cost trade-offs suitable for varied roof spaces and budgets.
Wind Requires Open Space: High average wind speeds (14+ mph) and specific zoning clearances are critical for effective small wind turbine operation.
Biomass/Biogas Utilizes Waste: Turn organic refuse into usable energy, ideal for properties with substantial agricultural or household organic waste.
Micro-Hydro Demands Water Flow: A consistent water source with adequate “head” (fall distance) and “flow” (quantity) can provide reliable, low-maintenance power.
Generators Offer Backup: While not a primary “free” source, generators provide crucial reliability during grid outages, often using more efficient fuels like biodiesel.
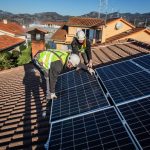
Harnessing the Sun: The Power of Solar Panels
Solar energy remains the most popular entry point for homeowners looking to produce free electricity at home. Its appeal lies in its widespread availability and ever-improving technology. But not all solar setups are created equal, and your property’s specific conditions will dictate the best approach.
Are You a Good Candidate for Solar?
The first step is a thorough site assessment. Your property needs a minimum of four peak hours of sunlight daily and significant, shadow-free roof or ground space. “Peak hours” refer to the times when the sun is strongest, usually around midday. A professional solar company can perform an energy audit, assessing your roof’s tilt and direction to maximize efficiency. South-facing roofs are often ideal in the Northern Hemisphere, for example.
Navigating Panel Types: Efficiency vs. Cost
The solar market offers several panel technologies, each with distinct advantages:
Monocrystalline Panels: These are the sleek, dark panels you often see. They boast the highest efficiency, typically around 20% or more, meaning they convert more sunlight into electricity per square foot. This makes them ideal for smaller roofs or properties where space is at a premium. However, they are generally the most expensive option upfront.
Polycrystalline Panels: Identified by their blue, speckled appearance, polycrystalline panels offer a good balance of efficiency (around 16%) and affordability. They’re a solid choice for homeowners with ample roof space who want to reduce initial costs without a massive drop in performance. They can be slightly less efficient in very high temperatures compared to monocrystalline.
Thin-Film Panels: These are the most flexible and least expensive, with efficiencies ranging from 7-13%. They are lightweight and can even be integrated into building materials. Their main drawback is that they require significantly more space to generate the same amount of power as crystalline panels, making them less practical for typical residential roof installations but potentially viable for large open ground areas.
The Solar Installation Journey
Financial Planning: Explore financing options, which can include loans, leases, or Power Purchase Agreements (PPAs). Many homeowners also consider a phased installation, starting with a single panel or a smaller array and expanding over time.
Incentives and Rebates: Crucially, check with your local utility provider and state energy office about available rebates, tax credits, or net metering programs. Net metering allows you to sell excess electricity generated by your panels back to the grid, often crediting your account for future use or even providing a payout. This significantly impacts the long-term economics of your system.
Mounting and Inverters: Once the panels are selected, they are mounted either on your roof or on a ground-mount system. The direct current (DC) electricity produced by the panels then flows to an inverter, which converts it into alternating current (AC) power—the type used by your home appliances and the electrical grid.
Grid Connection: Finally, your system is connected to your home’s electrical panel and, with appropriate permitting, to the utility grid.
Solar Costs and Returns
The upfront cost for a typical residential solar system ranges from $15,000 to $20,000, varying with property size, power needs, and panel type. However, factoring in federal tax credits (like the Investment Tax Credit), state incentives, and the potential income from selling excess electricity through net metering, the payback period can be surprisingly attractive. A well-designed system can pay for itself within 7-12 years, after which you are truly generating “free” electricity for decades.
Riding the Wind: Small Wind Systems
While less common in suburban areas, small wind turbines are an excellent solution for properties with consistent wind resources, offering another powerful way to produce free electricity at home.
Is Your Property Windy Enough?
The primary requirement for a viable small wind system is consistent, strong wind. You need an average wind speed of 14 miles per hour (23 km/hour) or more. Wind speed can vary significantly even within a few miles, so local data is crucial. You can often find online wind speed maps or obtain data from nearby airports or meteorological stations.
Beyond wind speed, local zoning regulations are a major hurdle. Many areas have strict limits on structure height. You’ll typically need to ensure your turbine is at least 35 feet (11 meters) tall, and preferably 30 feet (9.1 meters) higher than any structure within a 500-foot (150-meter) radius to avoid turbulence and maximize wind capture. Always check with your local planning department before proceeding.
Sizing Your Wind Turbine
Determining the right turbine size involves a bit of calculation. A professional assessment is highly recommended, as they can accurately measure wind efficiency at various heights and locations on your property. However, a basic formula can give you an idea of the minimum rotor diameter needed: AEO = (0.01328)D^2V^3
Where:
AEO is your annual energy output in kilowatt-hours per year (kWh/year).
D is the rotor diameter in feet.
V is the average annual wind speed in miles per hour.
This formula shows that small increases in wind speed (V) or rotor diameter (D) lead to substantial increases in energy output. Therefore, placing the turbine higher and in an unobstructed location is paramount.
The Installation Process and Costs
Once your site is confirmed suitable and zoning permits are secured, you’ll purchase a turbine system from a local supplier. These systems include the turbine, tower, wiring, and often an inverter (similar to solar, to convert DC to AC power).
Small wind systems typically cost around $5,120 per kilowatt (kW) of capacity needed. While the initial investment can be substantial, a well-sited turbine in a consistently windy location can provide a reliable, long-term source of “free” electricity.
Repurposing Waste: Biomass and Biogas Systems
For those with a substantial organic footprint, turning waste into watts via biomass or biogas systems offers a unique and sustainable path to produce free electricity at home. This method transforms discarded materials into valuable energy.
Ideal Candidates for Waste-to-Energy
Biomass and biogas systems are particularly well-suited for properties that generate a lot of organic waste. Think of farms with animal manure, large gardens producing wood chips or old plant matter, or even homes that generate significant paper products and food scraps.
Biomass: This broadly refers to burning organic materials like wood chips, logging waste, agricultural residues, or even specific energy crops, to produce heat, steam, or electricity.
Biogas: Specifically, biogas is produced when organic matter (like animal waste, food scraps, or sewage) decomposes in an oxygen-free environment (anaerobic digestion). This process generates methane and carbon dioxide.
How It Works: From Waste to Power
In a biogas system, organic waste is fed into a digester, often a partially underground tank. Here, microbes break down the material, releasing biogas. This gas, primarily methane, is then captured and can be used directly for heating, cooking, or fueling a generator to produce electricity.
A key environmental benefit of biogas is that burning the methane in a controlled system is significantly better than simply allowing it to escape into the atmosphere. Methane is a potent greenhouse gas, and converting it to CO2 and water during combustion reduces its climate impact.
Installation and Economic Considerations
Installing a biomass or biogas system involves setting up the collection and processing infrastructure. For biogas, this includes the digester tank, gas collection system, and a generator if electricity is the goal. Professional consultation is highly recommended to properly size the system for your waste output and energy needs.
The initial cost for these systems generally ranges from $3,000 to $4,000 per kilowatt (kW) of capacity needed. While the upfront investment can be considerable, the ongoing operational costs are typically low, relying on readily available “free” fuel (your waste). With proper maintenance, these systems can provide a very cost-effective energy solution for decades.
Harnessing Water Flow: Micro-Hydro Systems
If your property is blessed with a natural stream or river, a micro-hydro system might be your most efficient and consistent route to produce free electricity at home. These systems leverage the kinetic energy of flowing water, offering continuous power generation.
The Prerequisites: Head and Flow
The viability of a micro-hydro system hinges on two critical factors:
Head: This is the vertical distance the water falls. The greater the “head,” the more pressure the water exerts, and the more power it can generate.
Flow: This refers to the quantity of water moving through the system over a given time. A consistent, ample flow is just as important as sufficient head.
Professional assessment is indispensable here. Agencies like the U.S. Geological Survey (USGS) or the Natural Resources Conservation Service (NRCS) can often provide guidance or resources for measuring stream flow rates and potential head on your property.
Navigating Permits and Environmental Impact
Before any installation, securing necessary permits is crucial. You’ll likely need permission from your county and potentially state environmental agencies. Investigating water rights—ensuring you have the legal right to divert or use the stream’s water—is also paramount. Furthermore, a thorough environmental impact assessment is often required to ensure your system doesn’t harm local ecosystems or aquatic life. This could involve careful planning for fish passage or sediment control.
System Design and Costs
A micro-hydro system typically involves diverting a portion of the stream’s water into a pipe (penstock) that carries it downhill to a turbine. The water pressure spins the turbine, which drives a generator. The generated electricity is then converted to usable AC power for your home.
The goal is to select a system that generates slightly more wattage than your home’s average monthly consumption. This provides a buffer and potential for selling excess power back to the grid if net metering is available.
Micro-hydro systems typically range from $1,500 to $2,000 per kilowatt (kW) of capacity. While the initial setup cost is often high, micro-hydro systems are renowned for their longevity and minimal maintenance requirements once installed. They can operate for decades, providing truly “free” and continuous power. Moreover, reducing your overall energy consumption through efficiency upgrades can significantly decrease the initial system size (and cost) needed.
Backup Power: Generators for Reliability
While not a source for “free” primary electricity due to ongoing fuel costs, generators play a crucial role in home energy independence by providing reliable backup power during grid outages. They ensure your critical systems remain operational when your renewable sources might be insufficient (e.g., cloudy days for solar, no wind for turbines) or the grid itself goes down.
Choosing the Right Generator
Fuel Type: Generators typically run on diesel, propane, or natural gas. Diesel and biodiesel generators are often more fuel-efficient than gasoline models, though diesel fuel itself can be slightly more expensive. Biodiesel offers a more environmentally friendly alternative derived from renewable sources.
Portability vs. Permanent Installation:
Portable Generators: These are smaller, less expensive, and can be moved. They’re great for powering essential appliances via extension cords.
Permanent Standby Generators: These are wired directly into your home’s electrical system and automatically turn on when grid power is lost. They’re more expensive but offer seamless, hands-free operation and can power a larger portion of your home.
The Pros and Cons of Generators
Advantages: Generators are relatively simple machines, making them easy to maintain. They provide immediate, on-demand power when other sources fail.
Disadvantages: They can be noisy, and their operation generates emissions. Most significantly, fuel costs can accumulate quickly, making them unsuitable as a primary “free” electricity source.
Costs
The cost of a generator can vary widely, from around $3,000 for a robust portable model to $10,000 or more for a permanently installed, whole-house standby unit, including installation. While an investment, it’s often seen as insurance against power disruptions, ensuring comfort and safety.
Practical Playbook: Choosing Your Renewable Path
Deciding which renewable energy system is right for your home hinges on your unique property characteristics and energy goals. Here’s a quick decision tree to help you navigate your options:
Do you have consistent, unobstructed sunlight for at least 4 hours daily?
Yes: Solar panels are likely your best bet. Consider monocrystalline for space efficiency, polycrystalline for cost-effectiveness.
No: Explore other options.
Does your property experience average wind speeds of 14 mph or more, and do you have space for a tall turbine (checking local zoning)?
Yes: A small wind system could be highly effective. Seek professional assessment for optimal turbine placement.
No: Wind is probably not practical for your location.
Do you generate a significant amount of organic waste (animal manure, crop residues, large garden waste)?
Yes: Biomass or biogas systems offer a sustainable way to convert waste into energy.
No: These systems might be overkill for typical household waste.
Do you have a consistent stream or river with adequate “head” (vertical drop) and “flow” (water quantity) on your property?
Yes: Micro-hydro could provide exceptionally reliable and continuous power. Professional assessment and navigating permits are crucial.
No: Micro-hydro is not an option.
Regardless of your primary renewable choice, are you concerned about power outages?
Yes: A backup generator (diesel or biodiesel) is a wise investment for energy resilience. Remember it’s for backup, not daily “free” power.
For a broader understanding of how all these pieces fit into a comprehensive strategy for home energy management, you might find value in our comprehensive guide: Generate free home electricity. It offers additional context on integrating these systems into a holistic approach to energy independence.
Quick Answers: Common Questions on Generating Home Electricity
Q: Is it really “free” electricity, or just an investment?
A: Initially, it’s an investment. The upfront costs for renewable systems can be significant. However, once the system has paid for itself through energy savings and incentives, the electricity produced is essentially “free” for the remainder of the system’s lifespan (often 20-40 years with proper maintenance). Q: What about maintenance for these systems?
A: Most renewable systems require relatively low maintenance. Solar panels need occasional cleaning. Wind turbines require periodic inspections and lubrication. Micro-hydro systems need regular debris clearing. Biogas systems need consistent feeding and occasional digester cleaning. Regular professional checks ensure longevity and efficiency. Q: Do I need to go completely off-grid to produce my own electricity?
A: Not at all. Many homeowners opt for grid-tied systems. This allows you to draw power from the utility grid when your system isn’t producing enough and sell excess power back to the grid (net metering) when you’re generating more than you need. Going off-grid requires batteries for storage, which adds significant cost and complexity. Q: How long do these systems typically last?
A: Solar panels are generally warrantied for 20-25 years, often performing well for 30+ years. Wind turbines can last 20-25 years. Micro-hydro systems are incredibly durable, often lasting 40-50 years with minimal maintenance. Biogas systems vary but can last 15-20 years. Q: Are there any environmental downsides to these systems?
A: While largely environmentally friendly, there can be localized impacts. Wind turbines can affect bird migration (though modern designs minimize this). Micro-hydro systems must be carefully designed to avoid disrupting aquatic ecosystems. Biomass combustion can produce localized air pollutants if not properly managed. Always consider thorough environmental impact assessments.
Taking the Next Step Towards Energy Independence
The journey to produce free electricity at home is both an investment and a commitment to a more sustainable lifestyle. It offers unparalleled control over your energy future, reducing your reliance on fluctuating utility prices and contributing positively to the environment.
Start by assessing your property’s unique resources. Is it bathed in sun, buffeted by wind, or does a stream run through it? Does your household or farm generate significant organic waste? Once you have a clearer picture of your site’s potential, reach out to local specialists for professional evaluations and detailed cost estimates. Research available incentives, rebates, and financing options that can significantly reduce your initial outlay.
Embracing renewable energy isn’t just about cutting bills; it’s about building resilience, fostering self-sufficiency, and making a tangible difference for future generations. The tools and knowledge are at your fingertips—the time to act is now.
I am a writer who loves renewable energy, with a focus on sustainable living, renewable energy, and eco-friendly innovation. With a passion for environmental awareness and a desire to explore the latest trends in green technology, corporate sustainability, and climate action. Through in-depth storytelling