Imagine a world where your electricity bill is a distant memory, powered by the very stream flowing through your property. This isn’t a futuristic dream; it’s a tangible reality made possible by a waterwheel power generator. For those with access to flowing water, these systems offer a sustainable, reliable path to energy independence, turning the kinetic energy of a stream into clean, off-grid electricity for your home or small business.
This guide dives deep into the mechanics, considerations, and practical steps of harnessing water’s power. We’ll explore how these ingenious devices work, what to look for in a suitable site, and how to set up your own system, transforming a natural resource into a constant source of clean energy.
Navigate Regulations: Be aware of local permits and environmental guidelines before starting your project.
Unlocking Consistent Energy: How a Waterwheel Power Generator Works
At its core, a waterwheel power generator is an elegant system designed to convert the mechanical energy of moving water into usable electricity. It’s a testament to simple physics, scaled to deliver real-world power.
Here’s the breakdown: Water from a stream or river is strategically diverted to a water wheel. As this water flows over or under the wheel, it imparts kinetic or potential energy, causing the wheel to rotate. This slow, powerful rotation is then transferred, often through an axle and a system of gears or belts, to an electrical generator. Inside the generator (typically an alternator or dynamo), electromagnetic induction takes over: magnets spin within copper coils, inducing an electric current that becomes your clean power source.
Choosing Your Water Wheel: Matching Type to Terrain
The effectiveness and efficiency of your waterwheel power generator largely depend on selecting the right type of wheel for your specific water source. This decision hinges on two crucial factors: the “head” (vertical drop of the water) and the “flow” (volume of water).
Undershot Wheels: Harnessing Velocity in Flat Lands
How it works: Water flows directly beneath the wheel, pushing against paddles or blades at its bottom. It relies purely on the kinetic energy (velocity) of the moving water.
Ideal for: Rivers or streams with a steady, swift flow but very little vertical drop (low head). Think of wide, meandering rivers in flatter terrain.
Considerations: Simpler to construct, but generally less efficient (often below 30%) because it doesn’t utilize gravitational potential energy. Requires a substantial and consistent flow to generate significant power.
Breastshot Wheels: Balancing Power in Moderate Settings
How it works: Water strikes the wheel around its midpoint, engaging a segment of its diameter. This design utilizes a combination of water velocity and gravitational potential energy.
Ideal for: Moderate head heights where the water can be delivered to the mid-section of the wheel. It’s a good compromise for sites that aren’t quite flat enough for undershot but lack the steep drop for overshot.
Considerations: Offers better efficiency than undershot wheels (typically 50-60%) and can be very effective if properly designed to capture both forces. Often requires careful construction of a flume or race to guide water precisely to the wheel’s breast.
Overshot Wheels: Maximizing Gravity in Hilly Terrain
How it works: Water is delivered to the top of the wheel and fills buckets or compartments on its periphery. The weight of the water in these buckets drives the wheel as gravity pulls them downwards.
Ideal for: Sites with a significant vertical drop (high head), often found in hilly or mountainous regions with smaller, steeper streams.
Considerations: These are typically the most efficient water wheels (up to 70-80%), as they predominantly harness the gravitational potential energy of the water. They require a sturdy structure to support the water delivery system (flume or penstock) and the wheel itself.
Pitchback Wheels: Enhanced Efficiency with Reduced Strain
How it works: Similar to an overshot wheel, but water is delivered slightly behind the top of the wheel. This causes the wheel to turn “backwards” relative to the water flow direction from the top.
Ideal for: Similar to overshot situations, but can offer enhanced efficiency and potentially reduce structural strain compared to a pure overshot due to how the water’s weight is distributed.
Considerations: A more refined version of the overshot, aiming to optimize water entry and exit for maximum torque and efficiency.
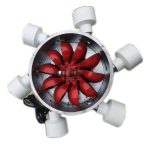
Pelton Wheels: High Pressure, Low Flow Specialists
How it works: Unlike the other types, the Pelton wheel uses a series of cups or buckets mounted on a rotating disk. High-pressure water jets are directed at these cups, imparting kinetic energy.
Ideal for: Situations with very high head (hundreds of feet) but relatively low water flow. Think of a small mountain stream with a significant vertical drop.
Considerations: Extremely efficient for its specific niche (often above 85-90%). Requires a durable nozzle and high-pressure penstock. These are typically smaller and operate at much higher RPMs than traditional water wheels.
Your choice of water wheel is foundational. A thoughtful assessment of your water source’s characteristics will guide you toward the most efficient and robust design for your independent power system.
Your Site’s Hydro Potential: Essential Measurements and Calculations
Before you even think about building, you need to understand your stream’s power potential. This involves precise measurements of “head” and “flow,” which are critical for sizing your waterwheel power generator.
Measuring Your “Head” (Vertical Drop)
The head is the vertical distance water falls from your diversion point to where it hits the water wheel. More head generally means more potential energy.
Identify Points: Locate the highest point where you can reasonably divert water from your stream (this is your intake) and the lowest point where the water will exit the wheel (your outlet).
Use a String Level: Stretch a taut string horizontally from the intake height. Use a string level to ensure it’s perfectly flat.
Measure Down: From various points along this horizontal string, measure the vertical distance down to the water’s surface at your proposed outlet. The greatest consistent vertical difference is your usable head.
Tip: Account for pipe friction if you’re using a penstock. While the actual head is your vertical drop, net head (what the wheel actually sees) can be slightly less due to energy losses in the delivery pipe.
Measuring Your “Flow” (Water Volume)
Flow is the volume of water moving through your stream over a period. This is often measured in gallons per minute (GPM) or cubic feet per second (cfs).
Build a Temporary Weir: Construct a small, temporary dam (a weir) in your stream using rocks, logs, or tarps. This should channel all the stream’s water into a single, narrow point.
The 5-Gallon Bucket Test: At this narrow point, place a 5-gallon bucket and time how many seconds it takes to fill completely.
Calculate GPM: Use this simple formula: GPM = (60 seconds / Time to fill in seconds) x Bucket size in gallons Example: If it takes 15 seconds to fill a 5-gallon bucket, your flow is (60 / 15) x 5 = 4 x 5 = 20 GPM.
Seasonal Variation: Crucially, perform this test during different seasons (especially dry periods) to understand your minimum consistent flow. Design your system around this minimum to ensure year-round reliability.
Estimating Your Power Potential
Once you have your head and flow, you can estimate the potential power output of your waterwheel power generator. This simple formula provides a rough estimate, accounting for typical system inefficiencies (around 50-60%). Power (Watts) = [Head (feet) x Flow (GPM)] / 10 Example: With 10 feet of head and 40 GPM of flow: Power = (10 feet x 40 GPM) / 10 = 400 / 10 = 40 Watts
This 40 Watts would produce approximately 1 kilowatt-hour (kWh) per day (40 Watts x 24 hours / 1000 = 0.96 kWh/day). This daily kWh value is what you’d compare to your home’s energy needs.
Other Critical Site Factors:
Consistent Flow: Is the stream’s flow rate consistent throughout the year, or does it fluctuate drastically?
Physical Space: Do you have enough space for the water wheel, generator, and associated structures without impeding natural flow or access?
Accessibility: Can you easily access the site for installation and routine maintenance?
Electrical Load: How much electricity do you actually need? This will dictate the required system size.
A thorough site assessment is the single most important step. It tells you if a waterwheel power generator is viable for your location and what scale of system you can realistically build.
Building Your Own Micro-Hydro System: Key Components Explained
Bringing a waterwheel power generator to life involves more than just the wheel itself. It’s a carefully orchestrated system of components, each playing a vital role in transforming flowing water into usable electricity.
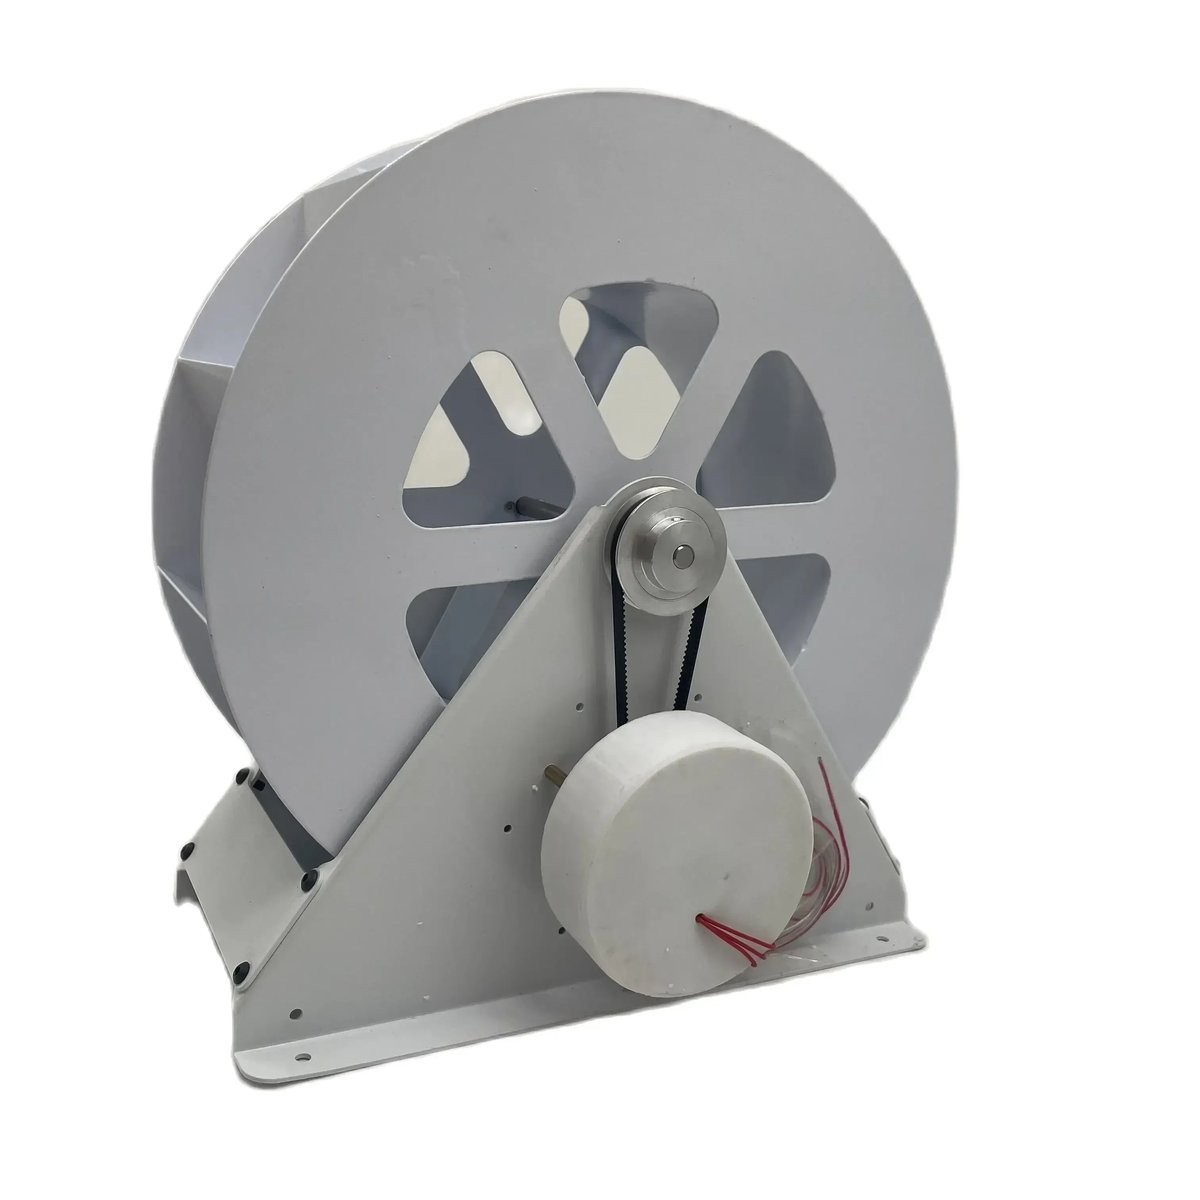
The Water Wheel: The Heart of the System
Design & Materials: For DIY projects, wood, repurposed metal, or durable plastics are common. It should be as large in diameter as your head allows for higher torque, which is beneficial for driving a generator at low speeds.
Rotational Speed (RPM): A water wheel typically rotates slowly (10-30 RPM). A good rule of thumb for optimal RPM (in rotations per minute) for a wheel is 21 / Diameter (in meters). This slow speed necessitates a gearing system.
The Generator: Converting Motion to Electricity
Permanent Magnet Alternators (PMAs): These are highly recommended for hydro systems. They are designed to generate electricity efficiently at lower RPMs and often produce a consistent voltage.
Permanent Magnet DC Motors: Repurposed DC motors (e.g., from old treadmills) can sometimes be modified to act as generators, producing DC power directly. They are a cost-effective option for smaller systems.
Car Alternators: While tempting due to availability, standard car alternators are generally less efficient at the low RPMs of water wheels. They also require external voltage to excite their field coils, adding complexity and reducing net output.
Gearing System: Speeding Things Up
The Necessity: Water wheels spin slowly, but most generators need to spin hundreds or even thousands of times faster to produce effective power. A gearing system bridges this rotational speed gap.
How it works: Using combinations of pulleys and belts, or sprockets and chains, you can step up the slow RPM of the wheel to the high RPM required by the generator. For instance, a 12:1 gear ratio means for every 1 rotation of the water wheel, the generator spins 12 times.
Design: Multiple stages of gearing might be needed to achieve the desired speed increase efficiently.
The Penstock: Guiding the Flow
Function: This is the pipe or open channel that carries water from your intake to the water wheel. It’s crucial for controlling and directing the water flow.
Sizing: Use the largest diameter pipe feasible. A larger diameter minimizes friction losses, ensuring maximum water force and head are delivered to the wheel.
Materials: PVC or ABS pipes are common choices for smaller systems due to their availability and ease of installation.
The Battery Bank: Storing Your Power
Purpose: Since electricity generation isn’t always perfectly matched with demand, deep-cycle batteries are essential for storing the generated power. This ensures you have consistent electricity available, even if the stream flow fluctuates or demand is high.
Type: Deep-cycle batteries are designed for repeated deep discharges and recharges, unlike car batteries.
The Charge Controller: Protecting Your Investment
Role: This device regulates the flow of electricity from your generator to your battery bank. It prevents overcharging, which can severely damage batteries and shorten their lifespan.
Functionality: It monitors battery voltage and current, disconnecting the generator or diverting excess power once batteries are full.
The Inverter: Making Power Usable
Conversion: Your battery bank stores DC (direct current) power. Most household appliances, however, run on AC (alternating current). An inverter converts the DC power from your batteries into usable AC power.
Sizing: Choose an inverter rated for your peak power demand (the maximum watts your appliances might draw simultaneously).
Each component is a link in the chain, and understanding their individual roles is key to designing a robust and reliable waterwheel power generator system for your home.
The Path to Power: Step-by-Step Installation Considerations
Setting up a waterwheel power generator is a rewarding project, but it requires careful planning and execution. Here’s a practical playbook for installation:
Site Preparation & Water Diversion:
Intake Structure: Build a sturdy intake system at your diversion point. This includes a screen to prevent debris (leaves, twigs, fish) from entering the penstock. Ensure it’s easily accessible for cleaning.
Weir/Dam: Construct a small, low-impact weir or dam to divert a portion of the stream’s flow into your penstock. Remember, never divert 100% of the stream; maintain sufficient flow for downstream ecosystems.
Sediment Trap: Consider a small settling pond or grit trap just after the intake to allow heavy sediment to drop out before entering the penstock, protecting your system from abrasion.
Penstock Installation:
Laying the Pipe: Install the penstock (pipe) from the intake to the water wheel. Ensure a continuous downward slope to maintain water pressure and avoid airlocks.
Support: Securely anchor the penstock to prevent movement, especially during heavy flows or freezing conditions. Use appropriate expansion joints if needed.
Valve: Install a gate valve or ball valve near the end of the penstock, just before the wheel, to control water flow and shut off the system for maintenance.
Water Wheel and Housing Setup:
Foundations: Construct a robust foundation for the water wheel, generator, and gearing system. This must withstand the weight, rotational forces, and environmental elements.
Wheel Mounting: Carefully mount the water wheel, ensuring it’s level and free to rotate. Align it precisely with the penstock’s outlet for optimal water impingement.
Housing: Build a protective housing around the wheel and generator. This shields components from weather, prevents accidental contact, and helps reduce noise.
Generator and Gearing Integration:
Alignment: Mount the generator and gearing system securely to their foundations. Precision alignment is crucial to minimize wear and maximize efficiency.
Belt/Chain Tension: Properly tension belts or chains in the gearing system. Too loose, and they’ll slip; too tight, and they’ll cause premature bearing wear.
Lubrication: Lubricate all moving parts (bearings, chains) as per manufacturer specifications during installation.
Electrical Wiring and Safety:
Waterproofing: All electrical connections must be rigorously waterproofed using junction boxes, marine-grade sealants, and appropriate conduits. Water and electricity are a dangerous combination.
Fuses & Breakers: Install appropriately sized fuses or circuit breakers at every critical point (e.g., between generator and charge controller, between batteries and inverter) to protect against overcurrents.
Grounding: Properly ground the entire electrical system to prevent shocks and protect equipment from lightning strikes.
Professional Help: If you’re not an experienced electrician, consult or hire one for this critical phase. Safety is paramount.
Battery Bank, Charge Controller, and Inverter Setup:
Location: Install these components in a dry, ventilated, and easily accessible area, preferably close to your home.
Wiring: Connect the generator to the charge controller, the charge controller to the battery bank, and the battery bank to the inverter, following the specific wiring diagrams of your chosen components. Use heavy-gauge wiring for DC circuits to minimize voltage drop.
Testing and Optimization:
Initial Test: Open the penstock valve slowly and observe the water wheel’s rotation. Check the generator’s output.
Voltage/Amperage Checks: Use a multimeter to verify that the charge controller is regulating power correctly and that the batteries are charging.
Load Testing: Gradually connect small electrical loads to the inverter to ensure it’s functioning correctly.
Fine-Tuning: Adjust water flow, gearing tension, and generator settings as needed to achieve optimal power output and system stability.
This multi-step approach ensures your waterwheel power generator is installed safely, efficiently, and effectively, providing reliable off-grid power for years to come.
Sustainable Power, Responsible Practices: Environmental and Legal Aspects
While a waterwheel power generator embodies sustainability, responsible deployment requires attention to both environmental impact and legal compliance. Ignoring these can lead to costly delays, fines, or damage to delicate ecosystems.
Environmental Considerations: Balancing Power with Preservation
Fish Protection: Your intake screen is vital. Design it with small enough openings to prevent fish from entering the penstock or being trapped against the screen. Consider specific screen designs that allow fish to easily bypass the intake, especially in areas with migratory species.
Maintain Downstream Flow: Never divert 100% of a stream’s flow. It’s critical to ensure sufficient water remains in the main channel to support aquatic life, maintain habitat, and satisfy downstream water users.
Material Choice: Opt for natural, untreated materials for any structures that interact directly with the water whenever possible. Avoid chemicals that could leach into the stream.
Habitat Disturbance: Minimize disturbance to riparian (streamside) vegetation during construction. These plants play a crucial role in preventing erosion and providing wildlife habitat.
Legal & Permitting: Navigating the Red Tape
This is perhaps the most overlooked, yet critical, aspect of installing a waterwheel power generator. Regulations vary drastically by location, sometimes even county to county.
Local Planning Departments: Start here. Check for zoning laws, building permits, and any restrictions on structures near waterways.
State Water Resources Departments: You will almost certainly need a water use permit. Water rights are complex and often highly regulated, especially concerning diversions from natural bodies of water.
Environmental Agencies (State & Federal): These agencies may require environmental impact assessments or have specific guidelines regarding stream alterations, fish passage, and wetland protection.
Neighboring Property Owners: If your stream flows through or borders other properties, open communication and potentially agreements with neighbors are vital to prevent future disputes.
Navigating these legal and environmental landscapes can be complex, but for those committed to harnessing the power of water for energy independence, it’s a necessary step. To understand the broader context of how such systems fit into an overall strategy for free, off-grid power, you can explore comprehensive resources on water wheel energy generation and its benefits: Generate free power with water wheels.
Costs & Financial Return: The Long-Term Investment
High Upfront Costs: Installing a waterwheel power generator can involve a substantial initial investment, often ranging from $5,000 to over $50,000, depending on the system’s size, required site preparation, and professional installation. This cost covers the wheel, generator, penstock, civil works, electrical components, and potentially permitting fees.
Long-Term Savings: While the initial outlay is significant, the operational costs are minimal after installation. You’re leveraging a free, renewable resource, which translates to long-term savings on electricity bills.
Incentives: Research government incentives, tax credits, and net metering programs in your area. These can significantly offset upfront costs and improve your return on investment, making the project more financially attractive.
Approaching your hydro project with a commitment to both environmental stewardship and legal compliance ensures that your waterwheel power generator is not only effective but also a truly sustainable and responsible energy solution.
Keeping the Current Flowing: Maintenance and Safety
A well-maintained waterwheel power generator provides consistent, reliable power for decades. Conversely, neglect can lead to diminished output, costly repairs, and safety hazards.
Routine Maintenance: Your System’s Lifeline
Debris Clearing (Daily/Weekly): The most frequent task will be clearing leaves, twigs, silt, and other debris from your intake screen and the water wheel itself. Clogged screens reduce flow, and debris on the wheel can unbalance it or reduce efficiency.
Bearing Lubrication (Monthly/Quarterly): Moving parts, especially bearings on the water wheel and generator shaft, require regular lubrication. Follow manufacturer guidelines for type and frequency of lubrication.
Electrical Connection Inspection (Quarterly): Regularly inspect all electrical connections (generator, charge controller, batteries, inverter). Ensure they remain tight, dry, and free of corrosion. Loose connections can generate heat, waste power, and pose fire risks.
Penstock Check (Annually): Inspect the penstock for leaks, cracks, or signs of structural compromise. Clear any sediment buildup that might reduce water flow.
Wheel Alignment & Balance (Annually): Over time, a water wheel can go out of alignment or become unbalanced due to wear or uneven debris buildup. Check its rotation for smoothness and make adjustments as needed.
Battery Bank Health (Monthly): For lead-acid batteries, check electrolyte levels and top up with distilled water if necessary. Monitor battery voltage and ensure the charge controller is functioning correctly to prevent overcharging or deep discharging.
Safety Protocols: Non-Negotiable Requirements
Electrical Safety:
Lockout/Tagout: Before performing any maintenance on the electrical system, always disconnect the power sources (generator and batteries) and use lockout/tagout procedures.
Insulated Tools: Use insulated tools when working with electrical components.
Grounding: Verify that the entire system remains properly grounded.
Waterproof Enclosures: Ensure all electrical components are housed in waterproof junction boxes or enclosures.
Mechanical Safety:
Protective Guards: Install protective guards around all moving parts of the water wheel and gearing system to prevent accidental entanglement.
Personal Protective Equipment (PPE): Always wear appropriate PPE, including gloves, safety glasses, and sturdy footwear, especially during installation and heavy maintenance.
Warning Signs: Post clear warning signs around the system, especially if it’s in an accessible area.
Environmental Safety:
Spill Prevention: Be mindful of potential spills of lubricants or battery acid. Have spill containment materials readily available.
Emergency Plan: Have an emergency plan in place for floods, equipment failures, or electrical accidents.
Regular maintenance and strict adherence to safety protocols are paramount to ensuring your waterwheel power generator operates efficiently, safely, and provides consistent power for decades.
Exploring Commercial Waterwheel Generators
While building a DIY waterwheel power generator is feasible for many, commercial units offer ready-to-install solutions, often with engineered efficiency and robust components. When considering a commercial generator, focus on these key aspects:
Power Output: Match the generator’s wattage (e.g., 500W, 1KW) to your specific energy needs.
Head and Flow Requirements: Ensure the unit is designed for your site’s specific head (vertical drop) and flow (GPM). Pelton wheels, for instance, excel in high head, low flow scenarios.
Output Voltage: Confirm the generator’s output voltage (e.g., 12V DC, 220V AC) is compatible with your battery bank, charge controller, and inverter system.
Material Durability: Look for corrosion-resistant materials like aluminum alloy and pure copper coils, which enhance efficiency and lifespan.
Efficiency Features: Pure copper coils, sealed designs, and robust bearings contribute to higher efficiency and longevity.
Portability: For smaller applications or demonstration units, portability might be a factor.
Noise Levels: Many modern units are designed for low mechanical noise (e.g., ≤55dB), important for residential or recreational settings.
Examples of commercial offerings provide a glimpse into the market:
MATYASIGO Pelton Impeller: A compact, polypropylene impeller designed for DIY enthusiasts, ideal for high-head, low-flow setups. It’s not a complete generator but a key component for custom builds.
Beduan Micro Water Turbine Generator: A 12V DC unit, suitable for powering small electronics or 10W LED lights. It’s built for longevity and low noise, perfect for very small, focused power needs.
Tiardocge 500W Portable Generator: Made from durable aluminum alloy with a pure copper coil, this unit supports a modest flow rate and offers portable power for small hydro stations, showcasing a balance of output and ease of deployment.
ZHOZHUT 1KW Hydro Generator: A more powerful option, delivering 1000W at 220V, capable of running multiple household devices. Its sealed design and smooth bearings indicate a focus on reliability.
ZBXGJKSY 500W Micro-Hydroelectric Generator: Lightweight and designed for a specific range of vertical drops (16.4 to 49.21 feet), it highlights the importance of matching the unit to your site’s characteristics.
When investing in a commercial waterwheel power generator, thoroughly research specifications, read reviews, and ideally, consult with an experienced hydro energy specialist to ensure the unit perfectly matches your site’s conditions and your energy requirements.
Quick Answers About Waterwheel Power Generation
Is a waterwheel power generator practical for everyone?
No, it’s highly site-specific. You need consistent access to flowing water with sufficient head (vertical drop) and flow (volume). Without these natural resources, other renewable energy options like solar or wind might be more practical.
How much power can a small waterwheel generate?
Even a small system with 10 feet of head and 40 gallons per minute (GPM) can generate around 40 watts continuously, equating to nearly 1 kWh per day. Larger systems can produce several kilowatts, enough to power an entire off-grid home.
What’s the biggest challenge in setting up a waterwheel generator?
The biggest challenge is often the initial site assessment and navigating permitting and environmental regulations. Accurately measuring head and flow, and securing necessary permissions, can be time-consuming and complex.
Can I combine a waterwheel generator with solar or wind power?
Absolutely. Combining a waterwheel power generator with solar panels or wind turbines creates a robust hybrid system. Hydro provides consistent base load power, while solar and wind can supplement during peak demand or when hydro output is lower due to seasonal flow variations, leading to greater energy reliability.
Your Next Steps to Off-Grid Hydro Power
Taking the plunge into a waterwheel power generator system is a significant step toward true energy independence. You now understand the fundamental principles, the critical components, and the importance of a thorough site assessment. The journey begins not with a wrench, but with a measuring tape and a notebook.
Start by meticulously assessing your water source for head and flow. These numbers are your foundation. Based on those figures, begin to visualize which type of water wheel is best suited for your terrain. Next, research local and state regulations; early engagement with authorities can save considerable time and resources.
Embrace the challenge of this long-term investment in a sustainable future. With careful planning, a commitment to safety, and a respect for the environment, your waterwheel power generator can reliably deliver clean, free electricity to your home for decades to come.
I am a writer who loves renewable energy, with a focus on sustainable living, renewable energy, and eco-friendly innovation. With a passion for environmental awareness and a desire to explore the latest trends in green technology, corporate sustainability, and climate action. Through in-depth storytelling